Hexo進階設置
部署平台選型
前言
GitHub和Gitee(碼雲)是國內外比較流行的代碼託管平台,現都推出GitHub/Gitee Pages可以存放靜態網頁代碼,因此可以用來搭建自己的博客。
優缺點
| 平台 | 優點 | 缺點 |
|---|---|---|
| Github | 全球最流行的平台,且免費 | 國內由於有牆,訪問太慢 |
| Gitee | 國內訪問快 | 閹割部分功能,提供有償服務,比如自動部署、自定義域名等需要升級Gitee Pages Pro |
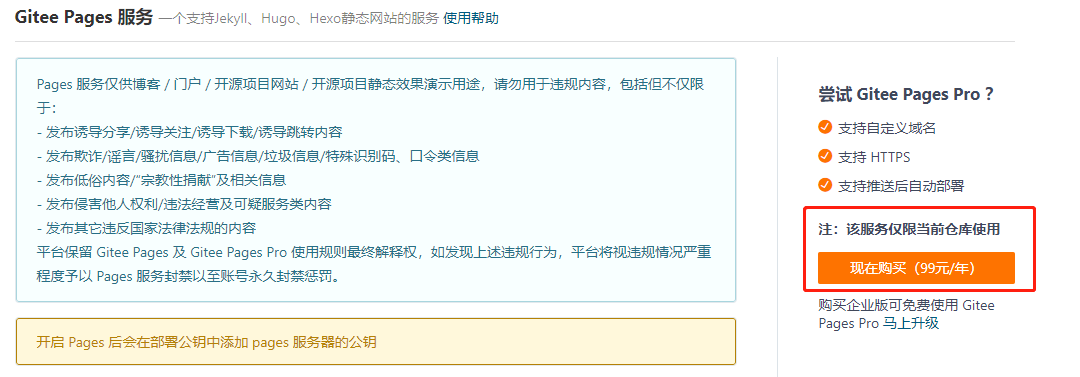
如上圖所示,Gitee是需要付費的,但是考慮到部署到Github上,在國內訪問真的太慢,經常加載要十幾秒,最終折中了選擇,即兩個平台同時部署,國外的用戶可以訪問Github,國內的用戶訪問Gitee,從而優化訪問速度。
修改_config.yml
deploy:
  type: git
  repo:
    github: [email protected]:[username]/[username].github.io.git,master
    gitee: [email protected]:[username]/[username].git,master
其中,這裡的 username指的是你在這兩個網站上的用戶名,只有以這種命名形式的倉庫,才能夠來訪問我們的博客。
- Github的倉庫名要命名為:{username}.github.io
- Gitee的倉庫名要命名為:{username}
比如說,我的Github和Gitee的username是geekvic,那麼在部署博客成功後,我就可以通過下邊的url來訪問我的Hexo博客:
主題選擇
Hexo主題地址://hexo.io/themes/, 我們可以去挑選自己喜歡的主題,每個主題在github上面都開源了源碼,下面主要以我選擇的theme-next主題進行介紹。
找到Hexo文件的目錄,如下圖所示。

進入theme文件夾,執行命令
git clone //github.com/theme-next/hexo-theme-next.git
下載完成後,則會在themes文件夾下出現一個新的名為hexo-theme-next的文件夾,這就是我們剛下載的主題,返回hexo站點的配置文件_config.yml,修改配置:
theme: hexo-theme-next
再執行下命令,就可以看到更改後的主題
hexo clean //清除一下緩存
hexo g  //生成靜態頁面
hexo s //開啟本地服務器
Hexo基礎設置
配置網站基礎信息
修改站點配置文件_config.yml中,修改:
# Site
title:          # 網站標題
subtitle:       # 網站副標題
description:    # 描述,介紹網站的
keywords:       # 網站的關鍵字
author:         # 博主姓名
language: zh-CN # 語言:zh-CN 是簡體中文
timezone:       # 時區
Next主題進階設置
配置主題
默認的主題配置文件_config.yml中,菜單只開啟了首頁和歸檔,我們根據需要,可以添加 about、tag、categories 等菜單
menu:
  home: / || fa fa-home
  about: /about/ || fa fa-user
  tags: /tags/ || fa fa-tags
  categories: /categories/ || fa fa-th
  archives: /archives/ || fa fa-archive
增加about頁面
進入Hexo目錄,執行hexo new page “about”,會發現在source目錄下多了個about目錄,在裏面的index.md寫入內容
增加tag頁面
hexo new page "tags"
vim source/tags/index.md
---
title: 標籤
date: 2020-05-20 17:06:19
type: tags
---
增加categories頁面
hexo new page "categories"
vim source/tags/index.md
---
title: 分類
date: 2020-05-20 17:06:19
type: "categories"
---
配置 hexo 中 next 主題樣式選擇
Next 一共提供了 4 種首頁樣式,按照自己喜好選擇一個,我使用的是Gemini
# Schemes
#scheme: Muse
#scheme: Mist
#scheme: Pisces
scheme: Gemini
配置footer信息
footer:
  since: 2020   # 建站開始時間
  icon:
    name: heart      # 設置 建站初始時間和至今時間中間的圖標,默認是一個'小人像',更改user為heart可以變成一個心
    animated: true
    color: "#ff0000"  # 更改圖標的顏色為紅色
  #顯示版權作者
  copyright: vic
  powered:
    enable: true        # 開啟hexo驅動顯示
    version: true       # 開啟hexo版本號
  theme:
    enable: true       # 開啟主題驅動
    version: true       # 開啟主題版本號
  beian:
    enable: true                # 開啟備案號顯示
    icp: 蘇ICP備...              # 備案號
配置頭像信息
# Sidebar Avatar
avatar:
  # Replace the default image and set the url here.
  url: /images/jin.png
  # If true, the avatar will be dispalyed in circle.
  rounded: false
  # If true, the avatar will be rotated with the cursor.
  rotated: true
配置社交信息和友鏈
social:
  GitHub: //github.com/yourname || github
  E-Mail: mailto:[email protected] || envelope
social_icons:
  enable: true         # 顯示社交圖標
  # 僅顯示圖標
  icons_only: true  # 只顯示圖標,不顯示文字
  transition: true   # 動畫效果
首頁文章屬性
post_meta:
  item_text: true    #  可以一行顯示,文章的所有屬性
  created_at: true    # 顯示創建時間
  updated_at:
    enabled: true     # 顯示修改的時間
    another_day: true  # 設true時,如果創建時間和修改時間一樣則顯示一個時間
  categories: true    # 顯示分類信息
開啟文章目錄
toc: #側欄中的目錄
  enable: true #是否自動生成目錄
  number: true #目錄是否自動產生編號
  wrap: false  #標題過長是否換行
  expand_all: false
  max_depth: 6 #最大標題深度
Follow me on GitHub
github_banner:
  enable: true
  permalink: //github.com/yourname
  title: Follow me on GitHub
字數統計、閱讀時長
首先安裝插件:
$ npm install hexo-symbols-count-time --save
主題配置文件修改如下:
symbols_count_time:
  separated_meta: true # 統計信息不換行顯示
  item_text_post: true # 文章統計信息中是否顯示「本文字數/閱讀時長」等描述文字
  item_text_total: false # 底部footer站點統計信息中是否顯示「本文字數/閱讀時長」等描述文字
  awl: 4 # 平均字符長度
  wpm: 275 # 閱讀速度, 一分鐘閱讀的字數
站點配置文件 新增如下:
# 新增文章字數統計
symbols_count_time:
  #文章內是否顯示
  symbols: true # 文章字數
  time: true # 閱讀時長
  # 網頁底部是否顯示
  total_symbols: false # 所有文章總字數
  total_time: false # 所有文章閱讀中時長
顯示當前瀏覽進度
右下角顯示文章當前瀏覽進度,提供意見置頂功能,編輯主題配置文件,配置如下:
back2top:
  enable: true #是否提供一鍵置頂
  sidebar: false
  scrollpercent: true # 是否顯示當前閱讀進度
閱讀進度
Next主題支持頁面滾動閱讀進度指示器。 編輯主題配置文件,配置如下:
reading_progress:
  enable: true
  position: top
  color: "#37c6c0"
  height: 3px
設置代碼高亮主題
Next 默認使用的是 白色的 normal 主題,可選的值有 normal,night, night blue, night bright, night eighties
codeblock:
  highlight_theme: normal
  copy_button:
    enable: true # 顯示複製按鈕
    show_result: true
    style: mac  #按鈕樣式: default | flat | mac
本地搜索插件
安裝插件
$ npm install hexo-generator-searchdb --save
修改站點配置文件,添加如下內容:
# 本地搜索
search:
  path: search.xml
  field: post
  format: html
  limit: 10000
- path:索引文件的路徑,相對於站點根目錄
- field:搜索範圍,默認是 post,還可以選擇 page、all,設置成 all 表示搜索所有頁面
- limit:限制搜索的條目數
修改主題配置文件
# Local Search
# Dependencies: //github.com/theme-next/hexo-generator-searchdb
local_search:
  enable: true
  trigger: auto
  top_n_per_article: 1 #每篇文章中顯示的搜索數量
  unescape: false
  preload: false
數據分析與統計
Next內置了leancloud、firebase、busuanzi三種訪客統計插件,前兩種需要到官網註冊獲取網站頒發的appKey,相對麻煩。而不蒜子配置只需要將false改為true即可:
busuanzi_count:
  enable: true
  # 總訪客數
  total_visitors: true
  total_visitors_icon: user
  # 總瀏覽量
  total_views: true
  total_views_icon: eye
  # 文章瀏覽量
  post_views: true
  post_views_icon: eye
本文作者: vic
同步個人博客: //geekvic.top/2020/05/19/hexo如何快速搭建個人博客/
版權聲明: 本博客所有文章除特別聲明外,均採用 BY-NC-SA 許可協議。轉載請註明出處!


