mpvue+小程序云开发,纯前端实现婚礼邀请函(相册小程序)

  • 2019 年 11 月 15 日
  • 笔记

请勿使用本文章及源码作为商业用途!

前言

当初做这个小程序是为了婚礼前的需要,结婚之后,希望这个小程序能够留存下来,特地花了一些空闲时间将小程序转化成为“相册类小程序”

体验码

准备工作

  1. mpvue框架 mpvue官方文档
  2. 小程序·云开发 小程序·云开发文档

注意:使用mpvue前,首先你得先熟悉vue框架的基本使用 

项目结构介绍

注意:接下来展示的代码,有几个对比,分别是本人优化前和优化后的代码对比,感兴趣的可以着重看一下优化后的成熟写法。

  • common目录: 放一些公共资源,如js,css,json
  • components目录:组件相关的.vue文件都放在这里
  • pages目录:所有页面都放在这个目录
  • utils目录:使用mpvue时自动生成,可忽略
  • app.json文件:
{    "pages": [      "pages/index/main",      "pages/photo/main",      "pages/map/main",      "pages/greet/main",      "pages/message/main"    ],    "window": {      "backgroundTextStyle": "light",      "navigationBarBackgroundColor": "#fff",      "navigationBarTitleText": "WeChat",      "navigationBarTextStyle": "black"    },    "tabBar": {      "color": "#ccc",      "selectedColor": "#ff4c91",      "borderStyle": "white",      "backgroundColor": "#ffffff",      "list": [        {            "pagePath": "pages/index/main",            "iconPath": "static/images/1-1.png",            "selectedIconPath": "static/images/1-2.png",            "text": "邀请函"        },        {            "pagePath": "pages/photo/main",            "iconPath": "static/images/2-1.png",            "selectedIconPath": "static/images/2-2.png",            "text": "甜蜜相册"        },        {            "pagePath": "pages/map/main",            "iconPath": "static/images/3-1.png",            "selectedIconPath": "static/images/3-2.png",            "text": "酒店导航"        },        {            "pagePath": "pages/greet/main",            "iconPath": "static/images/4-1.png",            "selectedIconPath": "static/images/4-2.png",            "text": "好友祝福"        },        {            "pagePath": "pages/message/main",            "iconPath": "static/images/5-1.png",            "selectedIconPath": "static/images/5-2.png",            "text": "留言评论"        }      ]    },    "requiredBackgroundModes": ["audio"]  }

  • App.vue文件 (本人主要是为了增加项目更新后的提醒),所以在这个文件加了些相关内容,内容如下:
<script>  export default {    onLaunch () {      // 检测小程序是否有新版本更新      if (wx.canIUse('getUpdateManager')) {        const updateManager = wx.getUpdateManager()        updateManager.onCheckForUpdate(function (res) {          // 请求完新版本信息的回调          if (res.hasUpdate) {            updateManager.onUpdateReady(function () {              wx.showModal({                title: '更新提示',                content: '新版本已经准备好,是否重启应用?',                success: function (res) {                  if (res.confirm) {                    // 新的版本已经下载好,调用 applyUpdate 应用新版本并重启                    updateManager.applyUpdate()                  }                }              })            })            // 小程序有新版本,会主动触发下载操作(无需开发者触发)            wx.getUpdateManager().onUpdateFailed(function () {              // 当新版本下载失败,会进行回调              wx.showModal({                title: '提示',                content: '检查到有新版本,下载失败,请检查网络设置',                showCancel: false              })            })          }        })      } else { // 版本过低则无法使用该方法        wx.showModal({          title: '提示',          confirmColor: '#5BB53C',          content: '当前微信版本过低,无法使用该功能,请升级到最新微信版本后重试。'        })      }    }  }  </script>    <style lang="stylus">  page      height 100%  image      display block  </style>

  • main.js文件:
import Vue from 'vue'  import App from './App'    Vue.config.productionTip = false  App.mpType = 'app'    wx.cloud.init({    env: '云开发环境ID'  })    const app = new Vue(App)  app.$mount()

  • functions目录:主要放一些云函数,这里不清楚云函数的文章后面会提及
  • images目录:主要放一些静态资源图片

页面介绍

首页——邀请函

首页着重和大家讲解下背景音乐的实现方法

const audioCtx = wx.createInnerAudioContext()

wx.createInnerAudioContext 接口获取实例

接着,通过实例的相关方法来实现音乐的播放与暂停功能

关于小程序音频相关文档

具体代码如下:

<script>  import IndexSwiper from 'components/indexSwiper'  import tools from 'common/js/h_tools'  const audioCtx = wx.createInnerAudioContext()  export default {    name: 'Index',    components: {      IndexSwiper    },    data () {      return {        isPlay: true,        list: []      }    },    onShow () {      const that = this      that.isPlay = true      that.getMusicUrl()    },      methods: {      audioPlay () {        const that = this        if (that.isPlay) {          audioCtx.pause()          that.isPlay = false          tools.showToast('您已暂停音乐播放~')        } else {          audioCtx.play()          that.isPlay = true          tools.showToast('背景音乐已开启~')        }      },        getList () {        const that = this        const db = wx.cloud.database()        const banner = db.collection('banner')        banner.get().then(res => {          that.list = res.data[0].bannerList        })      },        getMusicUrl () {        const that = this        const db = wx.cloud.database()        const music = db.collection('music')        music.get().then(res => {          let musicUrl = res.data[0].musicUrl          audioCtx.src = musicUrl          audioCtx.loop = true          audioCtx.play()          that.getList()        })      }    },      onShareAppMessage: function (res) {      return {        path: '/pages/index/main'      }    }  }  </script>

以上代码中使用到了云开发相关功能,文章后面会介绍,请大家稍安勿躁

相册页——就一个轮播图,这里就不过多介绍

地图页——这里着重讲一下地图标签map

map标签 关于map组件的使用文档

这里讲一下标记点markers:

data () {      return {        // qqSdk: '',        markers: [{          iconPath: '../../static/images/nav.png',          id: 0,          latitude: 30.08059,          longitude: 115.93027,          width: 50,          height: 50        }]      }    }

<template>      <div class="map">          <image mode="aspectFit" class="head-img" src="../../static/images/t1.png"/>          <map class="content" id="map" longitude="115.93027" latitude="30.08059" :markers="markers" scale="18" @tap="toNav">          </map>          <div class="call">              <div class="left" @tap="linkHe">                  <image src="../../static/images/he.png"/>                  <span>呼叫新郎</span>              </div>              <div class="right" @tap="linkShe">                  <image src="../../static/images/she.png"/>                  <span>呼叫新娘</span>              </div>          </div>          <image class="footer" src="../../static/images/grren-flower-line.png"/>      </div>  </template>

祝福页——也是云开发相关内容,后面会介绍

留言页——也是云开发相关内容,后面会介绍

云开发介绍

小程序云开发文档

project.config.json文件:

"cloudfunctionRoot": "static/functions/"

进行云开发首先我们需要找到上面这个文件,在上面这个json文件中加上上面这行代码

cloudfunctionRoot 用于指定存放云函数的目录

app.json文件:

"window": {      "backgroundTextStyle": "light",      "navigationBarBackgroundColor": "#fff",      "navigationBarTitleText": "WeChat",      "navigationBarTextStyle": "black"  },  "cloud": true

增加字段 "cloud": true实现云开发能力的兼容性

开通云开发

在开发者工具工具栏左侧,点击 “云开发” 按钮即可开通云开发

云开发控制台

数据库

 云开发提供了一个 JSON 数据库


存储


云开发提供了一块存储空间,提供了上传文件到云端、带权限管理的云端下载能力,开发者可以在小程序端和云函数端通过 API 使用云存储功能。


云函数


云函数是一段运行在云端的代码,无需管理服务器,在开发工具内编写、一键上传部署即可运行后端代码。

使用云开发

云能力初始化

在小程序端开始使用云能力前,需先调用 wx.cloud.init 方法完成云能力初始化

import Vue from 'vue'  import App from './App'    Vue.config.productionTip = false  App.mpType = 'app'    wx.cloud.init({    env: '云开发环境ID'  })    const app = new Vue(App)  app.$mount()

数据库的使用

在开始使用数据库 API 进行增删改查操作之前,需要先获取数据库的引用。以下调用获取默认环境的数据库的引用:

const db = wx.cloud.database()

 要操作一个集合,需先获取它的引用:

const todos = db.collection('todos')

操作数据库的相关示例

例:首页获取背景音乐资源

getMusicUrl () {        const that = this        const db = wx.cloud.database()        const music = db.collection('music')        music.get().then(res => {          let musicUrl = res.data[0].musicUrl          audioCtx.src = musicUrl          audioCtx.loop = true          audioCtx.play()          that.getList()        })  }

 例:首页获取轮播图数组

getList () {        const that = this        const db = wx.cloud.database()        const banner = db.collection('banner')        banner.get().then(res => {          that.list = res.data[0].bannerList        })  }

例:祝福页,用户送上祝福存储用户

<script>  import tools from 'common/js/h_tools'  export default {    name: 'Greet',    data () {      return {        userList: [],        openId: '',        userInfo: ''      }    },    onShow () {      const that = this      that.getUserList()    },    methods: {      scroll (e) {        console.log(e)      },        sendGreet (e) {        const that = this        if (e.target.errMsg === 'getUserInfo:ok') {          wx.getUserInfo({            success: function (res) {              that.userInfo = res.userInfo              that.getOpenId()            }          })        }      },        addUser () {        const that = this        const db = wx.cloud.database()        const user = db.collection('user')        user.add({          data: {            user: that.userInfo          }        }).then(res => {          that.getUserList()        })      },        getOpenId () {        const that = this        wx.cloud.callFunction({          name: 'user',          data: {}        }).then(res => {          that.openId = res.result.openid          that.getIsExist()        })      },        getIsExist () {        const that = this        const db = wx.cloud.database()        const user = db.collection('user')        user.where({          _openid: that.openId        }).get().then(res => {          if (res.data.length === 0) {            that.addUser()          } else {            tools.showToast('您已经送过祝福了~')          }        })      },        getUserList () {        const that = this        wx.cloud.callFunction({          name: 'userList',          data: {}        }).then(res => {          that.userList = res.result.data.reverse()        })      }    }  }  </script>

获取送祝福的好友列表

getUserList () {        const that = this        wx.cloud.callFunction({          name: 'userList',          data: {}        }).then(res => {          that.userList = res.result.data.reverse()        })  }

这里用到了云函数,之所以用云函数是因为小程序端在获取集合数据时服务器一次默认并且最多返回 20 条记录,云函数端这个数字则是 100。

云函数的使用方法

上面我们讲过在project.config.json文件中配置云函数存放位置

下面是云函数messageList的index.js文件:

不成熟写法:

const cloud = require('wx-server-sdk')  cloud.init()  const db = cloud.database()  const MAX_LIMIT = 100  exports.main = async (event, context) => {    // 先取出集合记录总数    const countResult = await db.collection('message').count()    const total = countResult.total    // 计算需分几次取    const batchTimes = Math.ceil(total / 100)    // 承载所有读操作的 promise 的数组    const tasks = []    for (let i = 0; i < batchTimes; i++) {      const promise = db.collection('message').skip(i * MAX_LIMIT).limit(MAX_LIMIT).get()      tasks.push(promise)    }    // 等待所有    return (await Promise.all(tasks)).reduce((acc, cur) => ({      data: acc.data.concat(cur.data),      errMsg: acc.errMsg    }))  }

成熟写法(分页查询):

const cloud = require('wx-server-sdk')  cloud.init()  const db = cloud.database()  exports.main = async (event, context) => {    const wxContext = cloud.getWXContext()    const dbName = 'message'    const filter = event.filter ? event.filter : null    const pageNum = event.pageNum ? event.pageNum : 1    const pageSize = event.pageSize ? event.pageSize : 10    const countResult = await db.collection(dbName).where(filter).count()    const total = countResult.total    const totalPage = Math.ceil(total / pageSize)    let hasMore    if (pageNum >= totalPage) {      hasMore = false    } else {      hasMore = true    }    return db.collection(dbName).orderBy('time', 'desc').where(filter).skip((pageNum - 1) * pageSize).limit(pageSize).get().then(res => {      res.hasMore = hasMore      res.total = total      res.openId = wxContext.OPENID      return res    })  }

使用云函数前,在开发者工具上,找到messageList目录,右键如图:

 点击上传并部署:云端安装依赖(不上传node_modules)

得到如图的提示:

 安装完点击完成就能使用当前云函数了,使用方法即:

getUserList () {        const that = this        wx.cloud.callFunction({          name: 'userList',          data: {}        }).then(res => {          that.userList = res.result.data.reverse()        })  }

数组之所以要倒序是因为希望新祝福的的用户在最前面显示 

用户送上祝福的时候存储用户

这里我们用到了云函数获取用户信息,

当小程序端调用云函数时,云函数的传入参数中会被注入小程序端用户的 openid,开发者无需校验 openid 的正确性,因为微信已经完成了这部分鉴权,开发者可以直接使用该 openid

不成熟写法:

下面是云函数user的index.js文件:

// 云函数入口文件  const cloud = require('wx-server-sdk')    cloud.init()    // 云函数入口函数  exports.main = async (event, context) => {    const wxContext = cloud.getWXContext()      return {      event,      openid: wxContext.OPENID,      appid: wxContext.APPID,      unionid: wxContext.UNIONID    }  }

主要是为了获取当前操作用户的openid,获取当前用户的openid方法:

getOpenId () {        const that = this        wx.cloud.callFunction({          name: 'user',          data: {}        }).then(res => {          that.openId = res.result.openid          that.getIsExist()        })  }

接着判断当前用户是否已经存在于数据库中,即getIsExist()方法:

getIsExist () {        const that = this        const db = wx.cloud.database()        const user = db.collection('user')        user.where({          _openid: that.openId        }).get().then(res => {          if (res.data.length === 0) {            that.addUser()          } else {            tools.showToast('您已经送过祝福了~')          }        })  }

如果得到的数组长度为零则添加改用户到数据库,否则则提醒当前用户已经送过祝福

接下来介绍存储用户信息的方法,即addUser():
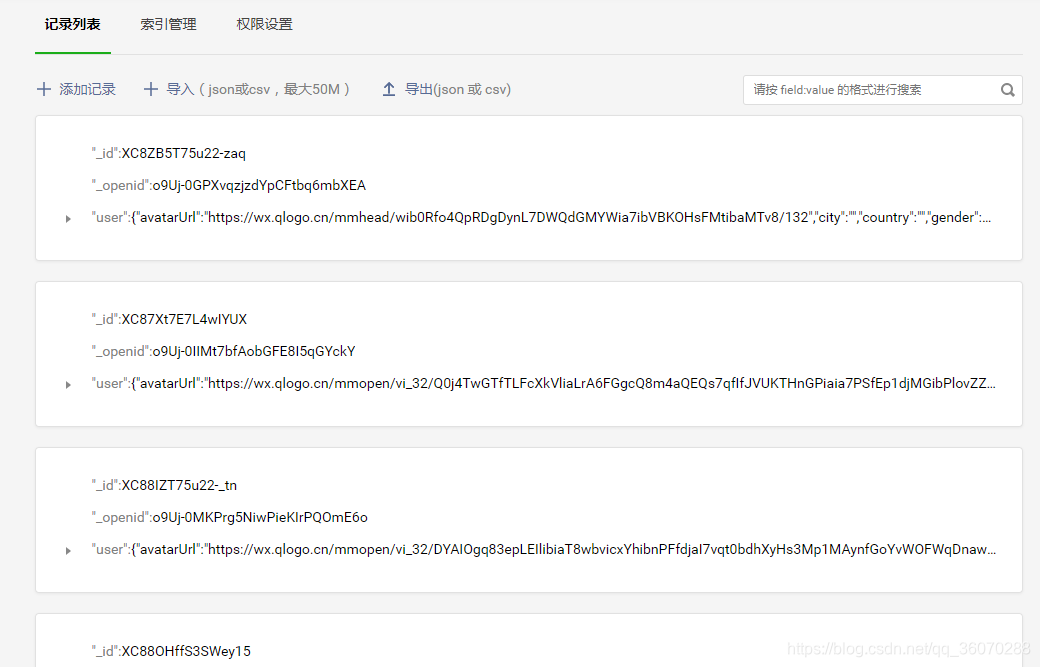
addUser () {        const that = this        const db = wx.cloud.database()        const user = db.collection('user')        user.add({          data: {            user: that.userInfo          }        }).then(res => {          that.getUserList()        })  }

存入到数据库的信息是这样的:

  • 成熟写法(使用云函数一次搞定)

// 云函数入口文件  const cloud = require('wx-server-sdk')  cloud.init()  const db = cloud.database()  exports.main = async (event, context) => {    const wxContext = cloud.getWXContext()    const dbName = 'user'    const filter = {      _openid: wxContext.OPENID    }    const countResult = await db.collection(dbName).where(filter).count()    const total = countResult.total    if (total) {      return {        has: true      }    } else {      return db.collection(dbName).add({        data: {          user: event.user,          _openid: wxContext.OPENID,          time: db.serverDate()        }      })    }  }

toMessage (e) {        const that = this        if (e.target.errMsg === 'getUserInfo:ok') {          wx.getUserInfo({            success: function (res) {              that.userInfo = res.userInfo              wx.navigateTo({                url: `/pages/writeMessage/main?avatar=${that.userInfo.avatarUrl}&name=${that.userInfo.nickName}`              })              that.addUser(that.userInfo)            }          })        }      },      addUser (obj) {        wx.cloud.callFunction({          name: 'addUser',          data: {            user: obj          }        })      }

总结 

大概的功能就是这么多,希望可以帮助到大家,觉得写得不错的记得给作者点个赞,你们的支持是我不断更新的最大动力!

源码地址

小程序源码在此

后续优化

  • 留言审核
  • 一些动画效果
  • 分页处理
  • 云函数优化
  • 回到顶部

最后

希望对那些有想法又不会后台开发的朋友一些启示作用,祝你早日做出只属于你自己的个人小程序