VUE3 之 循环渲染
1. 概述
老话说的好:单打独斗是不行的,要懂得合作。
言归正传,今天我们来聊聊 VUE3 的 循环渲染。
2. 循环渲染
2.1 循环渲染数组
<body>
    <div id="myDiv"></div>
</body>
<script>
    const app = Vue.createApp({     // 创建一个vue应用实例
        data() {
            return {
               myList:["apple", "pear", "orange"]
            }
        },
        template : `
            <div>
                <div v-for="item in myList">{{item}}</div>
            </div>
        `
    });

    // vm 就是vue应用的根组件
    const vm = app.mount('#myDiv');  // 绑定id为 myDiv 的元素

2.2 循环数组得到元素和下标
        template : `
            <div>
                <div v-for="(item, index) in myList">
                    {{index}} - {{item}}
                </div>
            </div>
        `

2.3 遍历对象
        data() {
            return {
               myObject:{
                    "firstFruit": "apple",
                    "secondFruit": "pear",
                    "thirdFruit": "orange"
               }
            }
        },

        template : `
            <div>
                <div v-for="(value, key, index) in myObject">
                    {{index}} - {{key}} - {{value}}
                </div>
            </div>
        `
遍历对象可以得到 下标、key 和 value

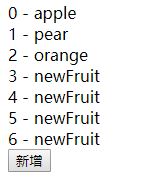
2.4 数组中追加元素
        data() {
            return {
               myList:["apple", "pear", "orange"]
            }
        },
        methods : {
            addElementToList() {
                this.myList.push("newFruit");
            }
        },
        template : `
            <div>
                <div v-for="(item, index) in myList">
                    {{index}} - {{item}}
                </div>
                <button @click="addElementToList">新增</button>
            </div>
        `

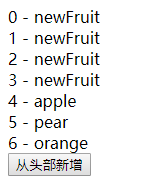
2.5 数组中从头部插入元素
        methods : {
            addElementToListHead() {
                this.myList.unshift("newFruit");
            },
        },
        template : `
            <div>
                <div v-for="(item, index) in myList" >
                    {{index}} - {{item}}
                </div>
                <button @click="addElementToListHead">从头部新增</button><br>
            </div>
        `

2.6 从数组尾部删除元素
        methods : {
            popElementFormList() {
                this.myList.pop();
            },
        },
        template : `
            <div>
                <div v-for="(item, index) in myList" >
                    {{index}} - {{item}}
                </div>
                <button @click="popElementFormList">从尾部删除</button>
            </div>
        `

2.7 从数组头部删除元素
        methods : {
            shiftElementFormList() {
                this.myList.shift();
            },
        },
        template : `
            <div>
                <div v-for="(item, index) in myList">
                    {{index}} - {{item}}
                </div>
                <button @click="shiftElementFormList">从头部删除</button><br>
            </div>
        `

2.8 替换整个数组
        methods : {
            replaceList() {
                this.myList = ["banana", "peach"];
            },
        },
替换数组后,页面会重新渲染新的数组

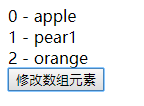
2.9 修改数组元素
        methods : {
            modifyListElement() {
                this.myList[1] = "pear1";
            },
        },

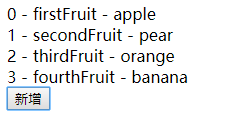
2.10 新增对象属性
        data() {
            return {
               myObject:{
                    "firstFruit": "apple",
                    "secondFruit": "pear",
                    "thirdFruit": "orange"
               }
            }
        },
        methods : {
            addAttributeToObject() {
                this.myObject.fourthFruit = "banana";
            }
        },
        template : `
            <div>
                <div v-for="(value, key, index) in myObject">
                    {{index}} - {{key}} - {{value}}
                </div>
                <button @click="addAttributeToObject">新增</button><br>
            </div>
        `

3. 综述
今天聊了一下 VUE3 的 循环渲染,希望可以对大家的工作有所帮助
欢迎帮忙点赞、评论、转发、加关注 :)
关注追风人聊Java,每天更新Java干货。
4. 个人公众号
追风人聊Java,欢迎大家关注


