用图像识别玩Chrome断网小游戏
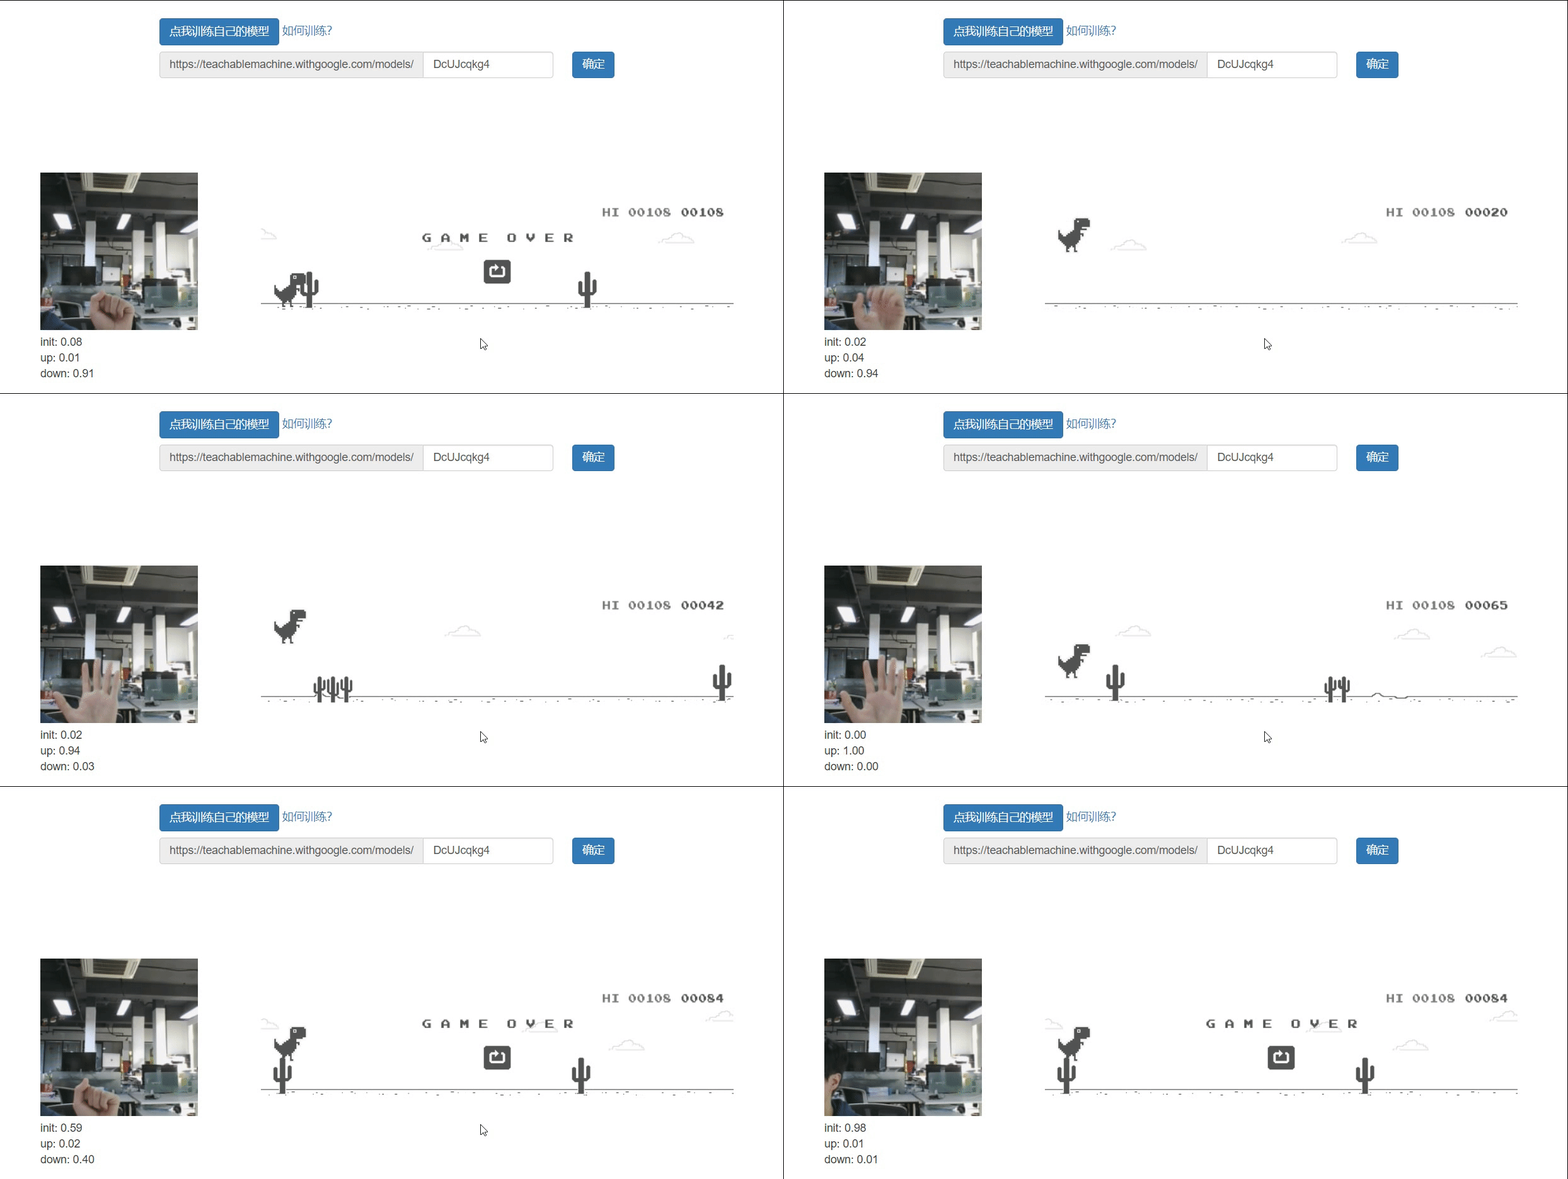
先来看一下效果

正文
最近在学习机器学习方面的知识,想着做个东西玩玩,然后就接触到了TensorFlow这个机器学习框架,这个框架封装了机器学习的一些常用算法。
不过要自己实现一套流程还是比较麻烦,我们可以使用谷歌开源的Teachable Machine来训练模型。这里不得不夸一下谷歌工程师的创造力,让我们能在不写一行代码的情况下训练模型。当然,如果要进一步应用,还是需要一些代码能力的。
在玩了一阵Teachable Machine后,我想到了一些好玩的点子,可不可以结合Teachable Machine和Chrome断网小游戏,通过图像识别来玩呢?显然是可以的,只是需要获得Chrome断网小游戏的源代码,在查询了一些资料后终于找到了他。//source.chromium.org/chromium/chromium/src/+/master:components/neterror/resources/offline.js
接下来就是改造时间,在Teachable Machine的官网上我们可以了解到他的使用方式,下面是官方的代码:
<div>Teachable Machine Image Model</div>
<button type="button" onclick="init()">Start</button>
<div id="webcam-container"></div>
<div id="label-container"></div>
<script src="//cdn.jsdelivr.net/npm/@tensorflow/[email protected]/dist/tf.min.js"></script>
<script src="//cdn.jsdelivr.net/npm/@teachablemachine/[email protected]/dist/teachablemachine-image.min.js"></script>
<script type="text/javascript">
    // More API functions here:
    // //github.com/googlecreativelab/teachablemachine-community/tree/master/libraries/image

    // the link to your model provided by Teachable Machine export panel
    const URL = "./my_model/";

    let model, webcam, labelContainer, maxPredictions;

    // Load the image model and setup the webcam
    async function init() {
        const modelURL = URL + "model.json";
        const metadataURL = URL + "metadata.json";

        // load the model and metadata
        // Refer to tmImage.loadFromFiles() in the API to support files from a file picker
        // or files from your local hard drive
        // Note: the pose library adds "tmImage" object to your window (window.tmImage)
        model = await tmImage.load(modelURL, metadataURL);
        maxPredictions = model.getTotalClasses();

        // Convenience function to setup a webcam
        const flip = true; // whether to flip the webcam
        webcam = new tmImage.Webcam(200, 200, flip); // width, height, flip
        await webcam.setup(); // request access to the webcam
        await webcam.play();
        window.requestAnimationFrame(loop);

        // append elements to the DOM
        document.getElementById("webcam-container").appendChild(webcam.canvas);
        labelContainer = document.getElementById("label-container");
        for (let i = 0; i < maxPredictions; i++) { // and class labels
            labelContainer.appendChild(document.createElement("div"));
        }
    }

    async function loop() {
        webcam.update(); // update the webcam frame
        await predict();
        window.requestAnimationFrame(loop);
    }

    // run the webcam image through the image model
    async function predict() {
        // predict can take in an image, video or canvas html element
        const prediction = await model.predict(webcam.canvas);
        for (let i = 0; i < maxPredictions; i++) {
            const classPrediction =
                prediction[i].className + ": " + prediction[i].probability.toFixed(2);
            labelContainer.childNodes[i].innerHTML = classPrediction;
        }
    }
</script>
分析源码,有两个地方是需要注意的:
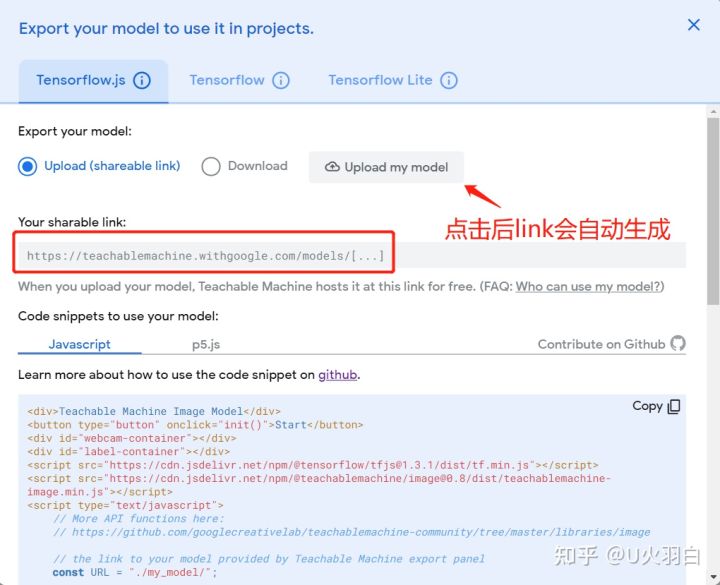
- 这里的URL就是模型的地址,可以使用网站上生成的地址,当然也可以保存下来放在自己的对象存储服务上
// the link to your model provided by Teachable Machine export panel
const URL = "./my_model/";
在官网上生成模型地址

2. 这里能拿到实时获取的预测数据
// run the webcam image through the image model
async function predict() {
    // predict can take in an image, video or canvas html element
    const prediction = await model.predict(webcam.canvas);
    for (let i = 0; i < maxPredictions; i++) {
        const classPrediction =
            prediction[i].className + ": " + prediction[i].probability.toFixed(2);
        labelContainer.childNodes[i].innerHTML = classPrediction;
    }
}
可以通过下面的方式获得最有可能的结果
let maxPrediction = prediction[0];
prediction.forEach(p => {
    if(p.probability > maxPrediction.probability) {
        maxPrediction = p;
    }
});
这里的maxPrediction就是最有可能的结果,maxPrediction.className可以获得结果的名称
接来下就是结合谷Chrome断网小游戏的代码,步骤很简单,识别结果的名称为up时,让小恐龙跳跃,为down时,让小恐龙蹲下,下面是具体代码
let state;
if(!state || maxPrediction.className === 'up') {
    console.log(maxPrediction.className);
    runner.tRex.speedDrop = false;
    runner.tRex.setDuck(false);
    //  Play sound effect and jump on starting the game for the first time.
    if (!runner.tRex.jumping && !runner.tRex.ducking) {
        runner.playSound(runner.soundFx.BUTTON_PRESS);
        runner.tRex.startJump(runner.currentSpeed);
    }
    state = 'up';
}
if(state === 'up' && maxPrediction.className === 'down') {
    console.log(maxPrediction.className);
    if (runner.tRex.jumping) {
        // Speed drop, activated only when jump key is not pressed.
        runner.tRex.setSpeedDrop();
    } else if (!runner.tRex.jumping && !runner.tRex.ducking) {
        // Duck.
        runner.tRex.setDuck(true);
    }
    state = 'down';
}
这样就可以通过图像识别来控制小恐龙的行为了。
项目地址
下面是项目的地址,感兴趣的同学可以看看。
游戏可以在线游玩,无需下载//blog.huajiayi.top/ai-t-rex-runner/
输入自己的模型准确率会更高,模型的训练方法可以看这里//github.com/huajiayi/ai-t-rex-runner


