一、springboot起航
- 2019 年 10 月 3 日
- 筆記
前言
之前零零散散的学习了一些springboot的知识,以及搭建一些springboot的项目,甚至还有一些项目应用到实际项目中了,但是突然有一天想要建一个自己的项目网站。发现自己不知道从何开始。发现自己虽然用了很久,但是让自己 从头开始搭建一个却处处碰壁。所以静下心来好好的整理一下springboot的知识点。以及给自己搭建一个springboot 项目的脚手架。以后方便自己套用。
创建spring boot项目
springboot的之所以火热便是因为开箱即用的特效,低配置甚至无配置使用,方便我们快速上手,我们这里先就什么都不配置吧。
在idea 上直接可以创建springboot 类型项目。
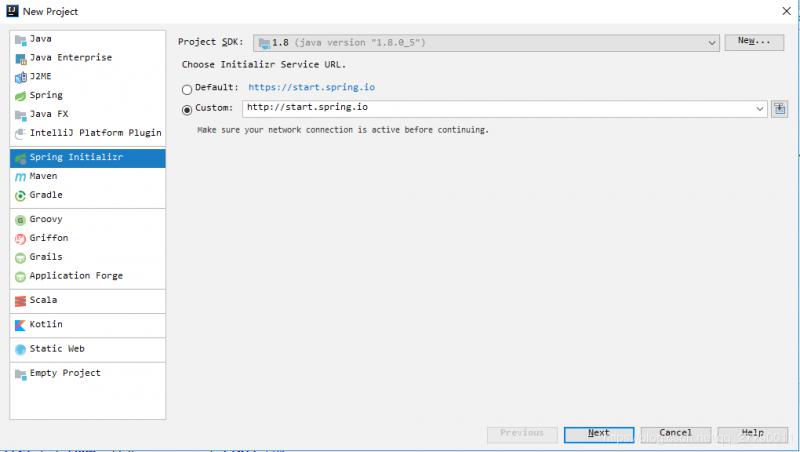
项目名就随便起吧,整个系列就都以这个项目为例啦,整个项目会分享到github 上,大家需要的可以跟着下载学习。
建好的项目目录如下:
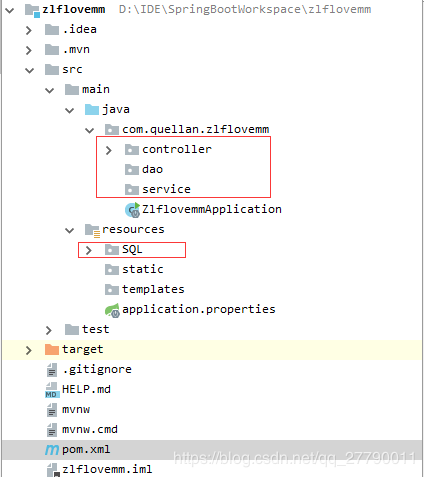
其中选中的文件夹是我自己加的,因为我想整个项目的目录大概就是这个样子了。文件名起了zlflovemm 没有什么项目含义,起名太难了,就起了一个自己纪念的名字,大家勿怪。
我们pom.xml 内容,因为后期不管是加其他组件,还是引用 jar 包什么的都是改这里。所以把最初版本拿出来。
<?xml version="1.0" encoding="UTF-8"?> <project xmlns="http://maven.apache.org/POM/4.0.0" xmlns:xsi="http://www.w3.org/2001/XMLSchema-instance" xsi:schemaLocation="http://maven.apache.org/POM/4.0.0 https://maven.apache.org/xsd/maven-4.0.0.xsd"> <modelVersion>4.0.0</modelVersion> <parent> <groupId>org.springframework.boot</groupId> <artifactId>spring-boot-starter-parent</artifactId> <version>2.1.8.RELEASE</version> <relativePath/> <!-- lookup parent from repository --> </parent> <groupId>com.quellan</groupId> <artifactId>zlflovemm</artifactId> <version>1.0.0</version> <name>zlflovemm</name> <description>zlflovemm project for Spring Boot</description> <properties> <java.version>1.8</java.version> </properties> <dependencies> <dependency> <groupId>org.springframework.boot</groupId> <artifactId>spring-boot-starter-web</artifactId> </dependency> <dependency> <groupId>org.springframework.boot</groupId> <artifactId>spring-boot-starter-test</artifactId> <scope>test</scope> </dependency> </dependencies> <build> <plugins> <plugin> <groupId>org.springframework.boot</groupId> <artifactId>spring-boot-maven-plugin</artifactId> </plugin> </plugins> </build> </project>可以看到pom.xml 文件里面东西很少了,
hello world
我们还是来写一个hello world 吧,虽然有点幼稚,但毕竟遵循一下古训。
我们在controller 包下创建一个demo 包。在demo 包下创建一个 demo.java .
@RestController public class Demo { @RequestMapping("/") public String demo(){ return "hello world"; } }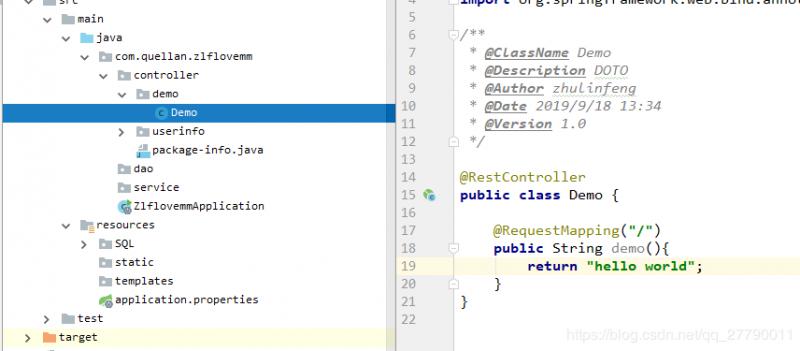
在controller 层用到的注解最多的就是@RestController 和@RequestMapping 了。@RestController和@Controller 注解是使用在controller层的。和@RequestMapping注解是用于设置映射路径的。这里注解就不深入讲解了,后面会进行深入的讲解。
我们代码写完之后,我们来启动项目看一下,这里我们就直接运行 ZlflovemmApplication中的 main 方法就好了。然后在浏览器输入
localhost:8080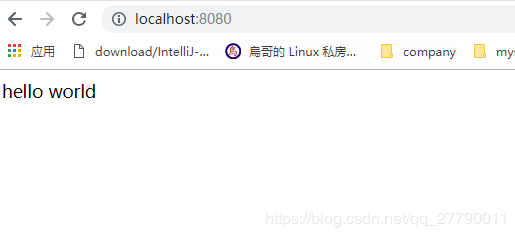
到此原型已经搭建好了,可以发现我们什么都没有配置,都是使用的默认的配置,直接写的测试代码,然后就可以直接使用。
但是这样对于一个项目来说远远不够的,我们来为项目增加一些配置。
配置mysql
其实一开始就配置mysql 太唐突了,但是一些小配置,不想再起一节,所以就一起了。
准备工作
首先当然是创建数据库和表啦,这里idea 也可以连接mysql 数据库,我们就一切都在idea上操作吧。
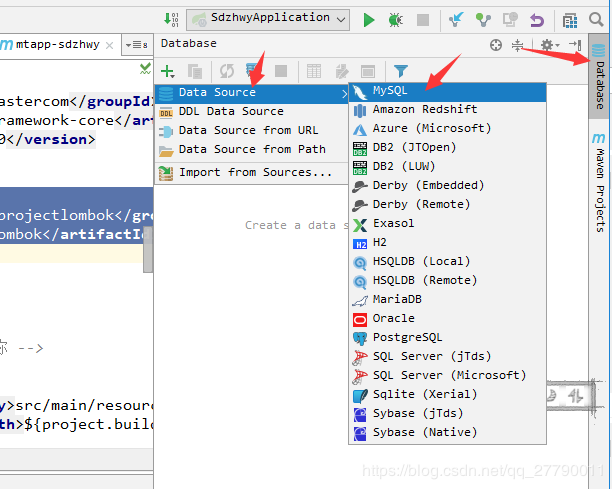
配置我们数据库连接,我这里已经在我的虚拟机上搭建好了mysql,说到搭建MySQL 也遇到一些坑。没有整理成单独的博客,大家可以参考Ubuntu18.04下安装MySQL
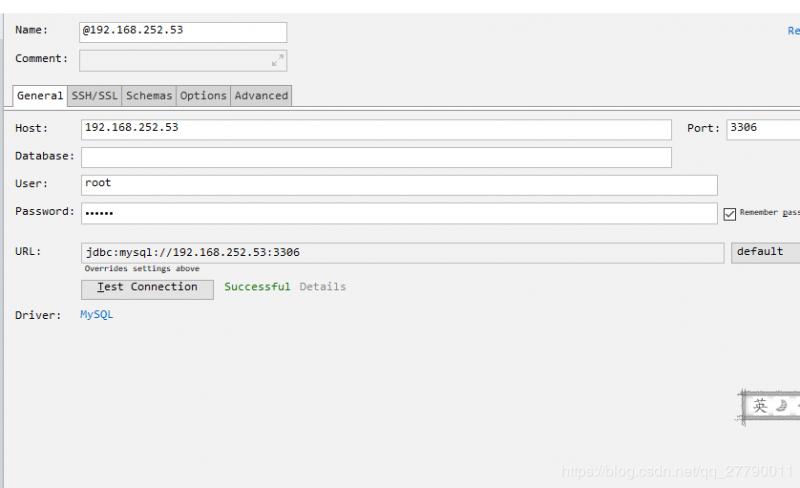
连接好之后,我们执行一下sql ,创建数据库,创建表,插入数据。
CREATE DATABASE /*!32312 IF NOT EXISTS*/`zlflovemm` /*!40100 DEFAULT CHARACTER SET utf8 */; USE `zlflovemm`; CREATE TABLE `sys_user` ( `id` INT(11) NOT NULL AUTO_INCREMENT, `username` VARCHAR(255) NOT NULL, `password` VARCHAR(255) NOT NULL, `email` VARCHAR(255) NOT NULL, `role_code` VARCHAR(255) NOT NULL, `role_name` VARCHAR(255) NOT NULL, `gmt_create` DATETIME NOT NULL, `gmt_update` DATETIME NOT NULL, `nickname` VARCHAR(255) DEFAULT NULL, `user_create` INT(11) NOT NULL, PRIMARY KEY (`id`) ) ENGINE=INNODB AUTO_INCREMENT=17 DEFAULT CHARSET=utf8; /*Data for the table `sys_user` */ INSERT INTO `sys_user`(`id`,`username`,`password`,`email`,`role_code`,`role_name`,`gmt_create`,`gmt_update`,`nickname`,`user_create`) VALUES (1,'admin','123456','[email protected]','admin','管理员','2019-03-21 14:30:57','2019-03-21 14:30:57','admin',1); 我们测试一下我们数据库建成功没有。
select * from sys_user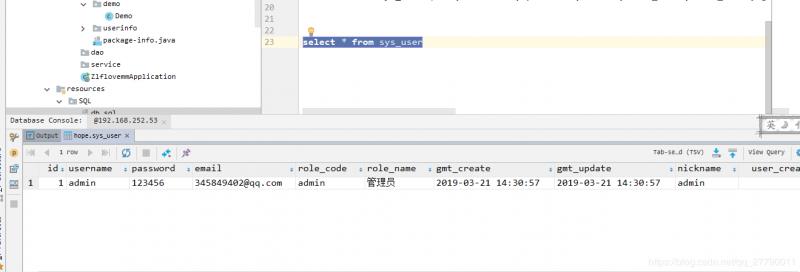
这样说明我们数据库是没有问题的。
pom.xml 中添加依赖
我们现在pom.xml 中添加依赖
<dependency> <groupId>mysql</groupId> <artifactId>mysql-connector-java</artifactId> <scope>runtime</scope> </dependency> <dependency> <groupId>org.springframework.boot</groupId> <artifactId>spring-boot-starter-jdbc</artifactId> </dependency> <dependency> <groupId>org.projectlombok</groupId> <artifactId>lombok</artifactId> </dependency>前面两个是mysql 依赖,lombok 是方便我们getter方法和setter方法以及引入日志的。后面代码中会体现。
配置application.properties
在application.properties中配置如下
server.port=9090 server.servlet.context-path=/zlflovemm server.tomcat.uri-encoding=UTF-8 spring.http.encoding.charset=UTF-8 spring.http.encoding.enabled=true spring.http.encoding.force=true spring.messages.encoding=UTF-8 spring.datasource.driver-class-name=com.mysql.jdbc.Driver spring.datasource.url=jdbc:mysql://192.168.252.53:3306/zlfdb?characterEncoding=utf-8&useSSL=false&zeroDateTimeBehavior=CONVERT_TO_NULL spring.datasource.username=root spring.datasource.password=123456 spring.datasource.max-idle=10 spring.datasource.max-wait=10000 spring.datasource.min-idle=5 spring.datasource.initial-size=5前面配置访问端口为9090,访问路径为/zllovemm/,设置编码格式为utf-8.下面就是配置mysql 。
编写测试
为了方便,我们就直接在controller编写测试。
在controller包中建一个包 userinfo ,在userinfo中创建一个UserController并编写
@RestController public class UserController { @Autowired private JdbcTemplate jdbcTemplate; @RequestMapping("/getUser") public List<Map<String, Object>> getUser(){ String sql="select * from sys_user"; return jdbcTemplate.queryForList(sql); } }
然后我们来启动项目,在浏览器中输入
http://localhost:9090/zlflovemm/getUser
可以看到数据库是配置成功的。当然正式的项目肯定不能这样写,正式的项目会采用mybatis 或者JPA ,这个后期项目肯定也是会用的,所以这里就暂时这样写。
番外
项目的雏形就先这样吧,后续加入其它组件,会继续在这个项目上跟新。
github地址:https://github.com/QuellanAn/zlflovemm
这篇就到这里吧,也算是开篇了,后续加油♡
