Qt 模拟一个导航定位系统
- 2019 年 10 月 3 日
- 筆記
版权声明:本文为博主原创文章,遵循 CC 4.0 BY-SA 版权协议,转载请附上原文出处链接和本声明。
本文链接:https://www.cnblogs.com/lihuidashen/p/11539755.html
https://mp.weixin.qq.com/s/b-DK1ndudiPtyFpbE8lseQ
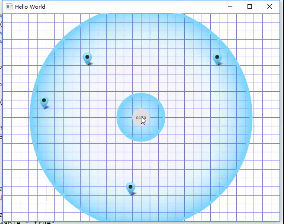
效果视频
软件结构

现在开始讲一下源码吧
重点:anchors锚布局
Discover { id: discover anchors.fill: parent//填充满父项 }
QML的布局方式一般采用两种,一种就是直接设置X与Y坐标的值。一种是采用相对位置布局,anchors锚布局,使用锚布局能够使界面更紧凑,更有整体化,我们将这种机制成为锚点(anchor)。锚点允许我们灵活地设置两个元素的相对位置。它使两个元素之间形成一种类似于锚的关系,也就是两个元素之间形成一个固定点。
锚点的行为类似于一种链接,它要比单纯地计算坐标改变更强。由于锚点描述的是相对位置,所以在使用锚点时,我们必须指定两个元素,声明其中一个元素相对于另外一个元素。锚点是Item元素的基本属性之一,因而适用于所有 QML 可视元素。
用锚定位
除了更传统的网格,行和列之外,Qt Quick还提供了一种使用锚点概念布局项目的方法。每个项目可以被认为具有一组7个不可见的“锚线”:left,horizontalCenter,right,top,verticalCenter,baseline和bottom。
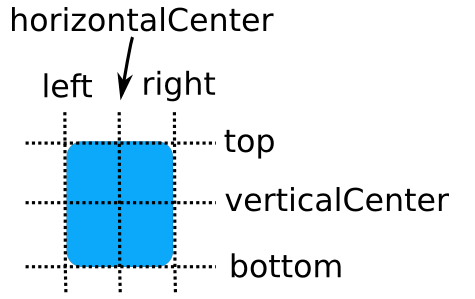
基线(上图未显示)对应于文本所在的虚线。对于没有文字的项目,它与顶部相同。Qt快速锚定系统允许您定义不同项目的锚线之间的关系。
用法有如下,这里不一一介绍。
anchors.baseline : AnchorLine anchors.baselineOffset : real anchors.bottom : AnchorLine anchors.bottomMargin : real anchors.centerIn : Item anchors.fill : Item anchors.horizontalCenter : AnchorLine anchors.horizontalCenterOffset : real anchors.left : AnchorLine anchors.leftMargin : real anchors.margins : real anchors.mirrored : bool anchors.right : AnchorLine anchors.rightMargin : real anchors.top : AnchorLine anchors.topMargin : realanchors.verticalCenter : AnchorLine anchors.verticalCenterOffset : real
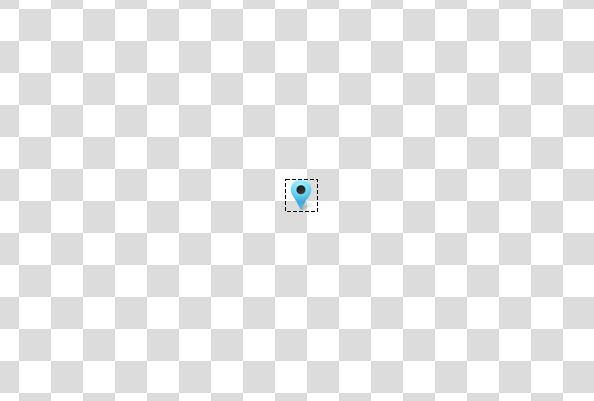
看看这个demo的程序吧,放一些固定的定位节点,将此设定在坐标下
property var positions: [Qt.point(80, 190), Qt.point(180, 90), Qt.point(280, 390), Qt.point(480, 90), Qt.point(80, 590)]
定位节点如图所示
将其画出来,这里在Qt 纯属娱乐-绘制一个模拟时钟 讲过,大家可以参考一下。
function drawLine(ctx, color, width, startX, startY, endX, endY) { ctx.strokeStyle = color; ctx.lineWidth = width; ctx.beginPath(); ctx.moveTo(startX, startY); ctx.lineTo(endX, endY); ctx.closePath(); ctx.stroke(); }
绘制图像
//绘制网格竖线 for(var i = 0; i < width; i += 20) drawLine(ctx, "#7266fc", 0.5,i + 0.5, 0, i + 0.5, height); //绘制网格横线 for(var j = 0; j < height; j += 20) drawLine(ctx, "#7266fc", 0.5, 0, j + 0.5, width, j + 0.5); //绘制地图标记 positions.forEach(function(point, i) { ctx.drawImage("qrc:/images/map_marker.ico", point.x, point.y); });
绘制扫描圆,这个算是精髓吧
for(var k = 0; k < 5; k += 0.5) { ctx.beginPath(); ctx.arc(halfWidth, halfHeight, r1 + k, 0, Math.PI * 2); ctx.closePath(); ctx.stroke(); ctx.beginPath(); if(!first) ctx.arc(halfWidth, halfHeight, r2 + k, 0, Math.PI * 2); ctx.closePath(); ctx.stroke(); }
最后,点击(“scan”) 开始定时画扫描圆,就出现这个画面了,还是有点炫酷的.

推荐阅读
(点击标题可跳转阅读)
Qt 学习笔记-强势入门
Qt 学习笔记-Qt中添加背景图片的方法
Qt 学习笔记-处理鼠标响应事件
Qt 纯属娱乐-绘制一个模拟时钟
Qt 学习笔记-中秋节,QPainter画一颗小心心送给你