Spring框架学习笔记(5)——Spring Boot创建与使用
- 2019 年 11 月 2 日
- 筆記
Spring Boot可以更为方便地搭建一个Web系统,之后服务器上部署也较为方便
创建Spring boot项目
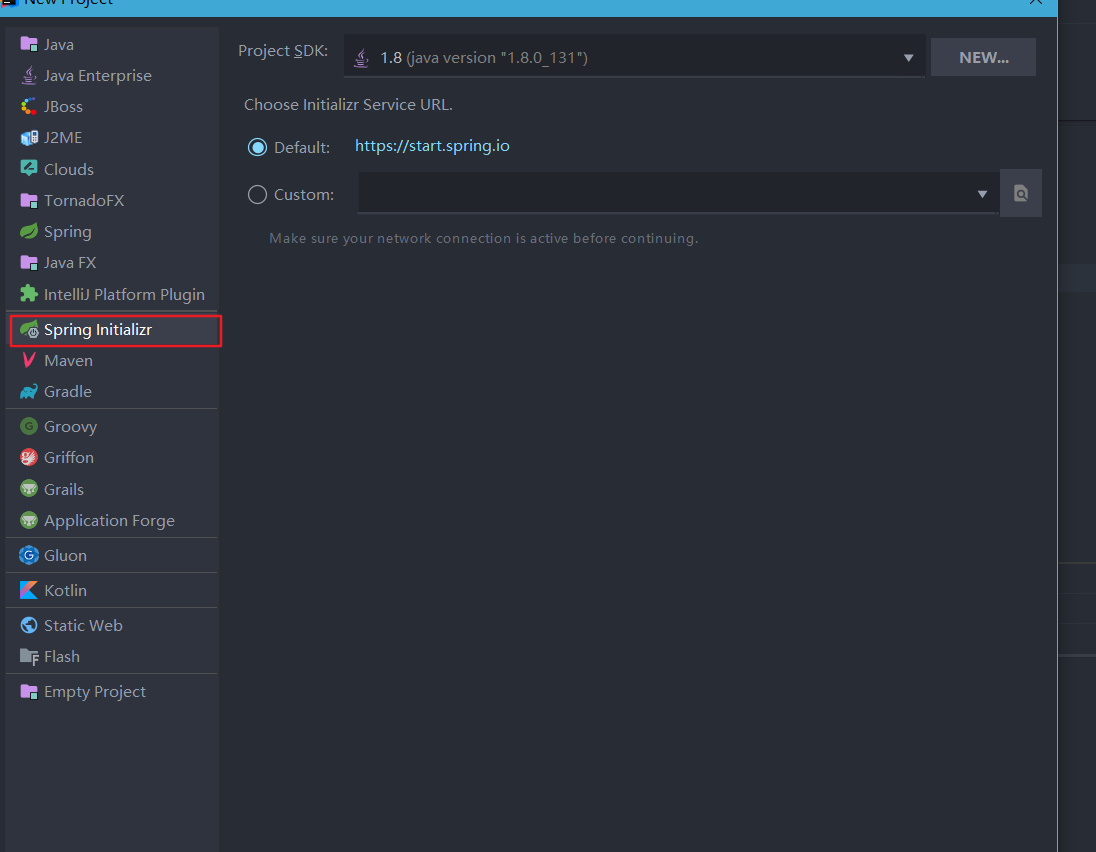
1. 使用IDEA创建项目
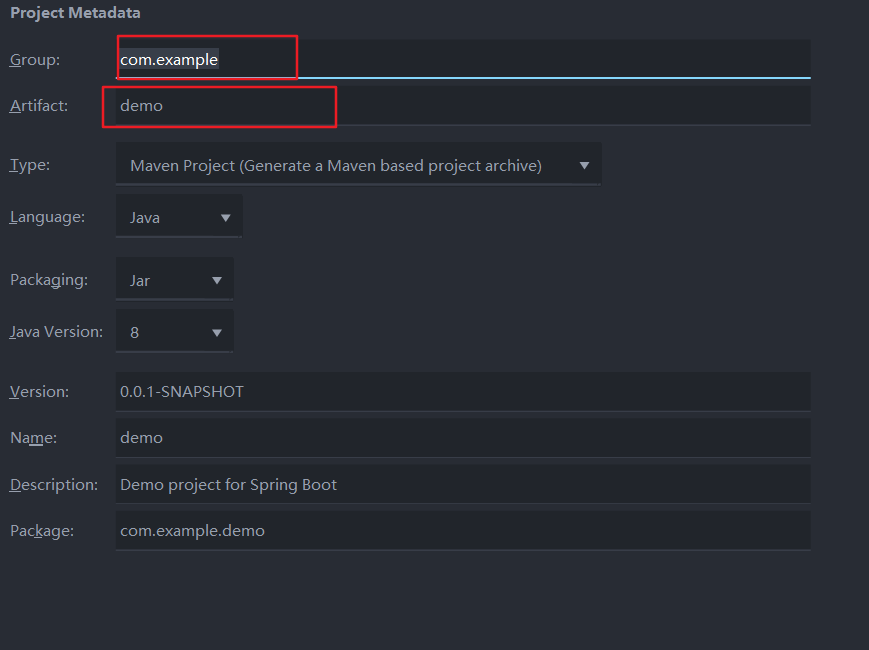
2. 修改groupid和artifact
3. 一路next,自动IDEA就会自动下载依赖的jar包
4. 运行
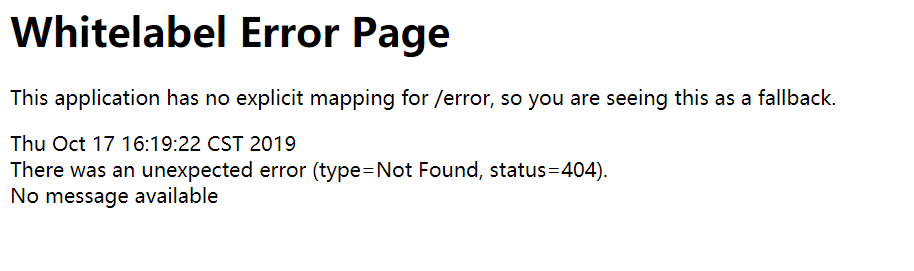
之后运行项目(Application类),打开http://localhost:8080就会出现下面的白板页面,说明已配置成功
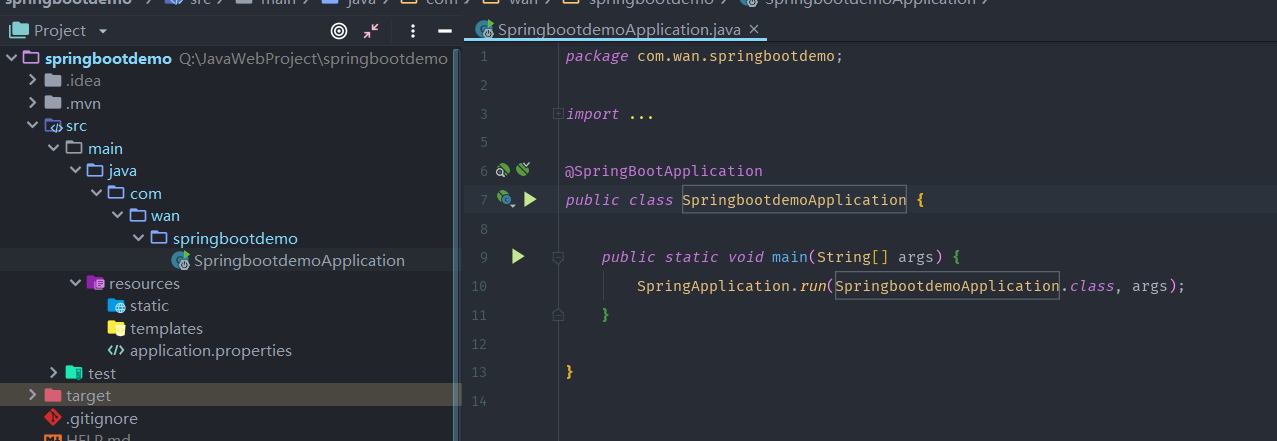
项目结构说明及使用
项目结构说明
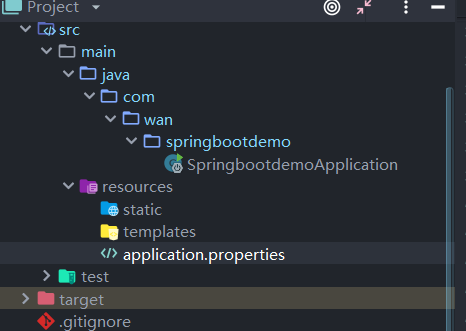
我们可以看见项目中是这样的结构,Spring boot内置了tomcat服务器,所以,我们可以直接通过application来启动
SpringbootdemoApplication
package com.wan.springbootdemo; import org.springframework.boot.SpringApplication; import org.springframework.boot.autoconfigure.SpringBootApplication; @SpringBootApplication public class SpringbootdemoApplication { public static void main(String[] args) { SpringApplication.run(SpringbootdemoApplication.class, args); } }可以看到SpringbootdemoApplication中的代码比较简单,使用了一个注解SpringBootApplication,用来标注当前类是Spring boot的入口类,之后通过SpringApplication.run启动
SpringBootApplication注解中也是内置了几个spring的注解,打开其中可以看到
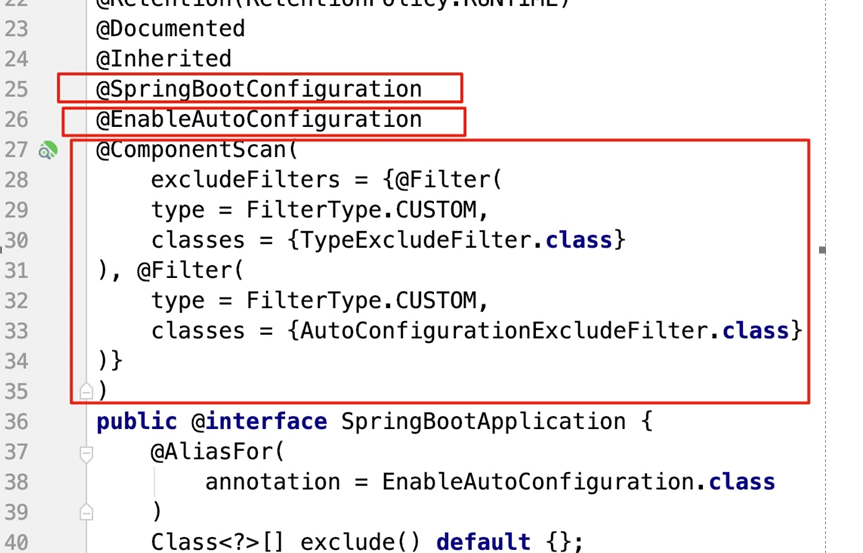
@SpringBootConfiguration 表示该类是一个配置类
@EnableAutoConfiguration 启用自动配置,例如添加了spring-boot-starter-web依赖,会自动添加Tomcat和SpringMVC的依赖,SpringBoot会对Tomcat和SpringMVC进行自动配置.
@ComponentScan 能扫描当前包及其子包中的类 即com.lanqiao.springboot.tutorials包及其子包下的所有的组件类。
spring boot使用一个封装的注解,把之前我们得使用注解和配置文件去配置spring的步骤都省去了,springboot不仅让我们的编码是轻量级的,而且也把我们的配置变成了轻量级
控制器使用
之前使用springmvc框架,我们写一个controller,得在配置文件中开启自动扫描,然后controller类中使用controller注解进行标明,而使用spring boot则不需要这么繁琐,只需要标注上一个@RestController注解即可
注解RestController包含了Controller和ResponseBody,返回的实体类或者List都会转为json数据
这里可以使用spring boot中的注解,也可以使用spring mvc的注解RequestMapping、ResponseBody等
package com.wan.springbootdemo.controller; import org.springframework.web.bind.annotation.RequestMapping; import org.springframework.web.bind.annotation.RestController; /** * @author StarsOne * @date Create in 2019/10/17 0017 18:24 * @description */ @RestController public class UserController { @RequestMapping("user/data") public String getData() { return "this is returning data"; } }然后通过访问localhost:8080/user/data就可以看到返回的数据
修改context项目地址
上面的项目接口中,我们可以看到一个名为application.properties的文件,里面可以用来进行一些设置,如context上下文,port端口号
补充:spring boot中除了使用properties这种文件进行配置,还可以使用yml文件
我在其中添加了下面的代码,就是用来设置context
server.servlet.context-path=/springbootdemo之后上面的controller的访问地址就会变为了localhost:8080/springbootdemo/user/data
去除spring boot启动图标
启动的时候,命令行会出现一个Spring Boot的页面
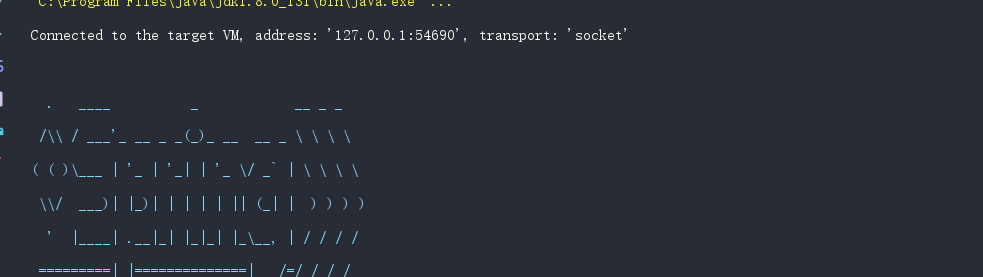
不知道为什么,我这里启动的图标怎么看都不像Spring Boot。。
我们想要去除这个图标,可以修改application中的启动方式来达到目的
package com.wan.springbootdemo; import org.springframework.boot.Banner; import org.springframework.boot.SpringApplication; import org.springframework.boot.autoconfigure.SpringBootApplication; @SpringBootApplication public class SpringbootdemoApplication { public static void main(String[] args) { SpringApplication springApplication = new SpringApplication(SpringbootdemoApplication.class); // 去除启动控制台Spring Boot的图标 springApplication.setBannerMode(Banner.Mode.OFF); springApplication.run(args); } } 热部署
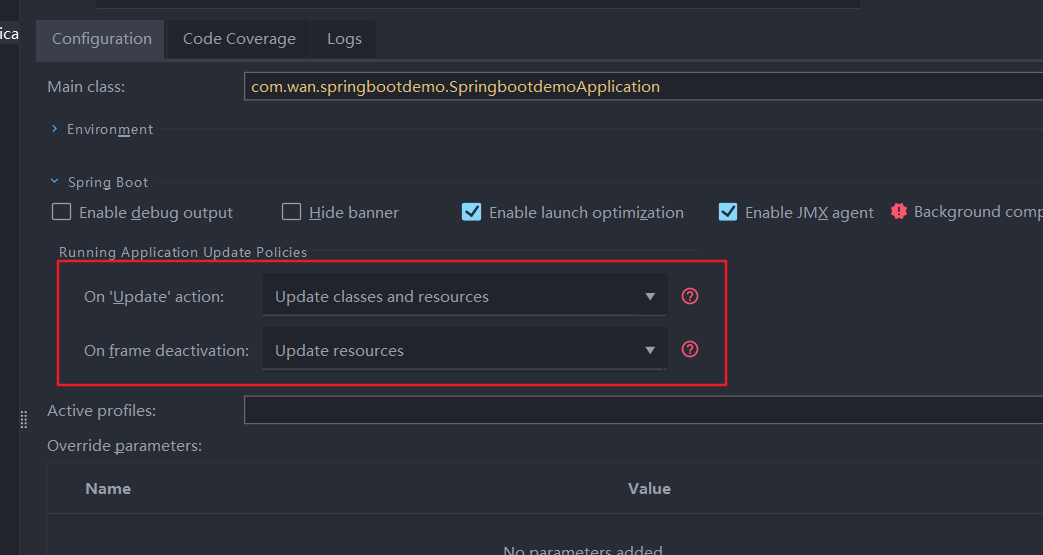
想要实现修改文件,而不想要重启application,可以进行热部署设置,设置很简单,只需要添加下面的这个依赖即可(之前创建项目的时候其实已经添加了此依赖)
<!-- 自动加载SpringBoot的更改 无需重启引导类 --> <dependency> <groupId>org.springframework.boot</groupId> <artifactId>spring-boot-devtools</artifactId> <optional>true</optional> </dependency> 可能还需要进行下面的运行配置:
整合MyBatis
1.添加依赖
添加下面的依赖 ``` <!-- 使用mybatis--> <dependency> <groupId>org.mybatis.spring.boot</groupId> <artifactId>mybatis-spring-boot-starter</artifactId> <version>2.1.0</version> </dependency> ```2.创表、创实体类和mapper
创表和创建实体类,还有创建对应的mapper.xml和mapper.java文件
这里需要注意,mapper接口文件需要加上注解@Repository,需要spring进行管理,之后我们需要一个对应的Service.java,包含着mapper接口,使用spring把mapper自动装载
package com.wan.mofang.service; import com.wan.mofang.mapper.UserMapper; import com.wan.mofang.model.User; import org.springframework.beans.factory.annotation.Autowired; import org.springframework.stereotype.Service; import java.util.List; /** * @author StarsOne * @date Create in 2019/10/28 0028 22:46 * @description */ @Service public class UserService { @Autowired UserMapper userMapper;//自动装载的对象 public List<User> selectAll(User user) { return userMapper.selectAll(user); } }UserController.java
package com.wan.mofang.controller; import com.wan.mofang.model.User; import com.wan.mofang.service.UserService; import org.springframework.beans.factory.annotation.Autowired; import org.springframework.web.bind.annotation.RequestMapping; import org.springframework.web.bind.annotation.RestController; import java.util.List; /** * @author StarsOne * @date Create in 2019/10/28 0028 22:54 * @description */ @RestController @RequestMapping("/user") public class UserController { @Autowired private UserService userService;//自动装载 @RequestMapping("selectAll") public List<User> selectAll(User user) { return userService.selectAll(user); } }PS:这里,需要注意的,如果是传入一个实体类,url传入的参数名要与User中的成员变量名一致,如果是String类型或者是Int类型,则url传入的参数则与参数名对应
如有下面的一个controller里面方法:
@RequestMapping("selectAll") public List<User> selectAll(String username) { return userService.selectAll(user); }传入的url为url=xx?username=xx
3.修改配置文件
这里使用yml来配置,当然,使用properties文件也可以,根据实际情况,进行修改(修改application-dev.yml)
application.yml
spring: profiles: active: devapplication-dev.yml
server: port: 端口号,默认不写就是8080 servlet: context-path: 项目上下文 spring: datasource: username: 数据库用户名 password: 数据库密码 url: 数据库地址 driver-class-name: oracle驱动 mybatis: mapper-locations: classpath:mapping/*Mapper.xml type-aliases-package: 好像配置了别名没有启动作用 #showSql logging: level: com: example: mapper : debug4.开启自动扫描
在Spring Boot启动类使用注解MapperScan,参数为mapper.java文件所在的包,就会自动扫描并生成mapper的bean对象
package com.wan.mofang; import org.mybatis.spring.annotation.MapperScan; import org.springframework.boot.SpringApplication; import org.springframework.boot.autoconfigure.SpringBootApplication; @MapperScan("com.wan.mofang.mapper") @SpringBootApplication public class MofangApplication { public static void main(String[] args) { SpringApplication.run(MofangApplication.class, args); } } Junit测试
直接创建一个入口类的对应的Test,之后使用上注解SpringBootTest,指定入口类,之后,需要的文件使用注解Autowired进行自动装载,
@SpringBootTest(classes = MofangApplication.class) class MofangApplicationTests { @Autowired UserService userService; @Test void testSelectALl(){ List<User> user = userService.selectALl(); ... } }