Centos 7 集成安装Apache+PHP+Kerberos+LDAP+phpLDAPadmin
- 2019 年 10 月 23 日
- 筆記
一、安装Apache
1.1、安装Apache
Apache程序是目前拥有很高市场占有率的Web服务程序之一,其跨平台和安全性广泛被认可且拥有快速、可靠、简单的API扩展。 它的名字取自美国印第安人土著语,寓意着拥有高超的作战策略和无穷的耐性,在红帽RHEL5、6、7系统中一直作为着默认的Web服务程序而使用,并且也一直是红帽RHCSA和红帽RHCE的考试重点内容。Apache服务程序可以运行在Linux系统、Unix系统甚至是Windows系统中,支持基于IP、域名及端口号的虚拟主机功能、支持多种HTTP认证方式、集成有代理服务器模块、安全Socket层(SSL)、能够实时监视服务状态与定制日志消息,并有着各类丰富的模块支持。
Centos7 在安装部署过程中,如果选择了web服务器,是会自动安装Apache的,如果没有选择安装web服务器模式,则需要手动安装。
查看Apache软件源
yum list | grep httpd
过程如下:
[root@duke ldap]# yum list | grep httpd
httpd.x86_64 2.4.6-80.el7.centos.1 @updates
httpd-tools.x86_64 2.4.6-80.el7.centos.1 @updates
httpd-devel.x86_64 2.4.6-80.el7.centos.1 updates
httpd-manual.noarch 2.4.6-80.el7.centos.1 updates
keycloak-httpd-client-install.noarch 0.6-3.el7 base
libmicrohttpd.i686 0.9.33-2.el7 base
libmicrohttpd.x86_64 0.9.33-2.el7 base
libmicrohttpd-devel.i686 0.9.33-2.el7 base
libmicrohttpd-devel.x86_64 0.9.33-2.el7 base
libmicrohttpd-doc.noarch 0.9.33-2.el7 base
python2-keycloak-httpd-client-install.noarch
安装Apache
yum install httpd -y
过程如下:
[root@duke ldap]# yum install httpd -y 已加载插件:fastestmirror, langpacks Loading mirror speeds from cached hostfile base | 3.6 kB 00:00:00 extras | 3.4 kB 00:00:00 updates | 3.4 kB 00:00:00 updates/7/x86_64/primary_db | 6.0 MB 00:00:00 软件包 httpd-2.4.6-80.el7.centos.1.x86_64 已安装并且是最新版本 无须任何处理
启动Apache
systemctl start httpd
开启启动Apache
systemctl enable httpd
过程如下:
[root@duke ldap]# systemctl start httpd
[root@duke ldap]# systemctl enable httpd
Created symlink from /etc/systemd/system/multi-user.target.wants/httpd.service to /usr/lib/systemd/system/httpd.service.
1.2、Apache安装目录信息
| 说明 | |
|---|---|
| 服务目录 | /etc/httpd |
| 主配置文件 | /etc/httpd/conf/httpd.conf |
| 网站数据目录 | /var/www/html |
| 访问日志 | /var/log/httpd/access_log |
| 错误日志 | /var/log/httpd/error_log |
1.3、配置Apache
在httpd服务程序主配置文件中最为常用的参数包括有:
| 参数 | |
|---|---|
| ServerRoot | 服务目录 |
| ServerAdmin | 管理员邮箱 |
| User | 运行服务的用户 |
| Group | 运行服务的用户组 |
| ServerName | 网站服务器的域名 |
| DocumentRoot | 网站数据目录 |
| Listen | 监听的IP地址与端口号 |
| DirectoryIndex | 默认的索引页页面 |
| ErrorLog | 错误日志文件 |
| CustomLog | 访问日志文件 |
| Timeout | 网页超时时间,默认为300秒. |
| Include | 需要加载的其他文件 |
1.3.1、将“全局服务器名称”设置为“禁止语法警告”
1.3.2、调整防火墙以允许Web流量
-
打开HTTP和HTTPS端口80和443
firewall-cmd --permanent --zone=public --add-service=http firewall-cmd --permanent --zone=public --add-service=https
过程如下:
[root@duke ldap]# ufirewall-cmd –permanent –zone=public –add-service=http
FirewallD is not running
[root@duke ldap]# ufirewall-cmd –permanent –zone=public –add-service=https
FirewallD is not running -
关闭防火墙(选择使用)
systemctl disable firewall systemctl stop firewall
- 暂时关闭selinux(选择使用)
setenforce 0
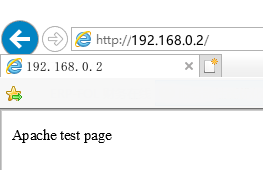
- 访问Apache
开放防火墙后就可以尝试登陆Apache服务器登陆 http://192.168.0.2/
界面如下:

1.4、Apache命令
重载配置
systemctl reload httpd
启动命令
/etc/init.d/httpd start 或 systemctl start httpd
停止命令
/etc/init.d/httpd stop 或 systemctl stop httpd
重启命令
/etc/init.d/httpd restart 或 systemctl restart httpd
查看版本
httpd -v
二、安装PHP开发环境
2.1、安装PHP
yum -y install php php-peer
过程如下:
root@yita-211:/# yum -y install php php-peer
已加载插件:fastestmirror, langpacks
Loading mirror speeds from cached hostfile
软件包 php-5.4.16-45.el7.x86_64 已安装并且是最新版本
没有可用软件包 php-peer。
无须任何处理
2.2、配置PHP
2.2.1、配置index.html
修改Apache在请求目录时提供文件的方式。Apache将首先从寻找一个名为index.html文件改为寻找index.php文件。
vim /etc/httpd/conf/httpd.conf
过程如下:
将
<IfModule dir_module> DirectoryIndex index.html index.php index.html.var </IfModule>
修改为
<IfModule dir_module> DirectoryIndex index.php index.html index.html.var </IfModule>
重启Apache
[root@duke ~]# systemctl restart httpd
2.3、安装PHP增强模块
2.3.1、查看PHP功能增强列表
yum search php- | less
过程如下:
[root@duke ~]# yum search php- | less
Loading mirror speeds from cached hostfile
============================== N/S matched: php- ===============================
emacs-php-mode.noarch : Major GNU Emacs mode for editing PHP code
php-bcmath.x86_64 : A module for PHP applications for using the bcmath library
php-cli.x86_64 : Command-line interface for PHP
php-common.x86_64 : Common files for PHP
php-dba.x86_64 : A database abstraction layer module for PHP applications
php-devel.x86_64 : Files needed for building PHP extensions
php-embedded.x86_64 : PHP library for embedding in applications
php-enchant.x86_64 : Enchant spelling extension for PHP applications
php-fpm.x86_64 : PHP FastCGI Process Manager
php-gd.x86_64 : A module for PHP applications for using the gd graphics library
php-intl.x86_64 : Internationalization extension for PHP applications
php-ldap.x86_64 : A module for PHP applications that use LDAP
php-mbstring.x86_64 : A module for PHP applications which need multi-byte string
: handling
php-mysql.x86_64 : A module for PHP applications that use MySQL databases
php-mysqlnd.x86_64 : A module for PHP applications that use MySQL databases
php-odbc.x86_64 : A module for PHP applications that use ODBC databases
php-pdo.x86_64 : A database access abstraction module for PHP applications
php-pear.noarch : PHP Extension and Application Repository framework
php-pecl-memcache.x86_64 : Extension to work with the Memcached caching daemon
php-pgsql.x86_64 : A PostgreSQL database module for PHP
php-process.x86_64 : Modules for PHP script using system process interfaces
php-pspell.x86_64 : A module for PHP applications for using pspell interfaces
php-recode.x86_64 : A module for PHP applications for using the recode library
php-snmp.x86_64 : A module for PHP applications that query SNMP-managed devices
php-soap.x86_64 : A module for PHP applications that use the SOAP protocol
php-xml.x86_64 : A module for PHP applications which use XML
php-xmlrpc.x86_64 : A module for PHP applications which use the XML-RPC protocol
2.3.2、安装增强功能
经过筛选,选择安装php-ldap、php-mbstring
yum install php-ldap php-mbstring
过程如下:
[root@duke ~]# yum install php-ldap php-mbstring
已加载插件:fastestmirror, langpacks
Loading mirror speeds from cached hostfile
软件包 php-ldap-5.4.16-45.el7.x86_64 已安装并且是最新版本
软件包 php-mbstring-5.4.16-45.el7.x86_64 已安装并且是最新版本
无须任何处理
2.3.3、编辑PHP配置
编辑PHP主配置文件,配置时间区域,命令如下
vim /etc/php.ini
php配置文件使用”;” 注释,在全文搜索 date.timezone字符串,进行如下修改,并将“;”号去掉即可,过程如下:
将
[Date]
; Defines the default timezone used by the date functions
; http://php.net/date.timezone
;date.timezone = “”
修改为
[Date]
; Defines the default timezone used by the date functions
; http://php.net/date.timezone
date.timezone = “Asia/Shanghai”
保存,并重启httpd服务
service httpd restart
2.4、测试PHP服务
2.4.1、添加测试文件
在/var/www/html下新建一个info.php文件,用于测试PHP是否配置成功
过程如下:
[root@duke ~]# vi /var/www/html/info.php <h2>PHP test page: <html> <body> <div style="width: 65%; font-size: 30px; font-weight: bold; text-align: center;"> <?php print Date("Y/m/d"); ?> </div> </body> </html> <?php phpinfo(); ?>
2.4.2、测试服务状态
在浏览器中输入服务器IP即可,如下图: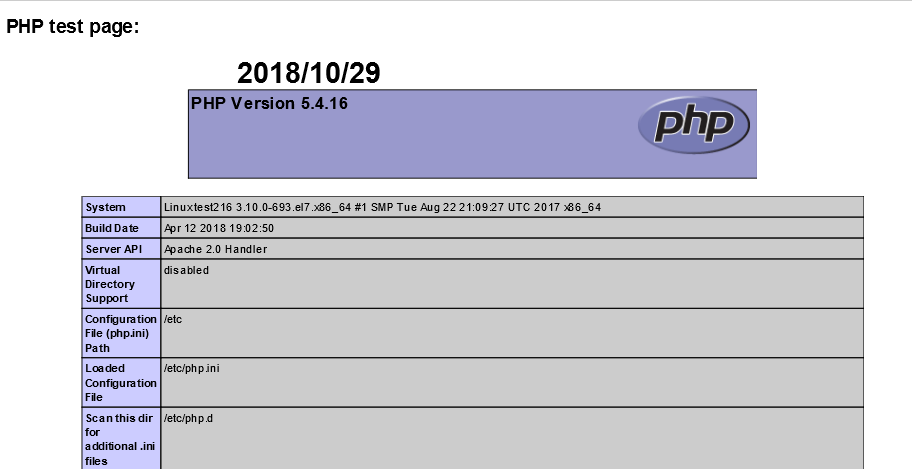

三、安装Kerberos
3.1、清理环境
0.1 停止服务
service krb5kdc stop service kadmin stop
0.2 卸载程序
yum remove -y krb5-devel, krb5-workstation, krb5-server, krb5-server-ldap
yum install krb5-server-ldap -y
3.2、 安装kerberos
yum install krb5-server-ldap -y
通过安装krb5-server-ldap可以把其他依赖的软件包安装完成
过程如下:
[root@duke yum.repos.d]# yum install krb5-server-ldap -y 已加载插件:fastestmirror, langpacks Loading mirror speeds from cached hostfile 正在解决依赖关系 --> 正在检查事务 ---> 软件包 krb5-server-ldap.x86_64.0.1.15.1-19.el7 将被 安装 --> 正在处理依赖关系 libkadm5(x86-64) = 1.15.1-19.el7,它被软件包 krb5-server-ldap-1.15.1-19.el7.x86_64 需要 --> 正在处理依赖关系 krb5-server(x86-64) = 1.15.1-19.el7,它被软件包 krb5-server-ldap-1.15.1-19.el7.x86_64 需要 --> 正在处理依赖关系 krb5-libs(x86-64) = 1.15.1-19.el7,它被软件包 krb5-server-ldap-1.15.1-19.el7.x86_64 需要 --> 正在检查事务 ---> 软件包 krb5-libs.x86_64.0.1.15.1-8.el7 将被 升级 --> 正在处理依赖关系 krb5-libs(x86-64) = 1.15.1-8.el7,它被软件包 krb5-devel-1.15.1-8.el7.x86_64 需要 --> 正在处理依赖关系 krb5-libs(x86-64) = 1.15.1-8.el7,它被软件包 krb5-workstation-1.15.1-8.el7.x86_64 需要 ---> 软件包 krb5-libs.x86_64.0.1.15.1-19.el7 将被 更新 ---> 软件包 krb5-server.x86_64.0.1.15.1-19.el7 将被 安装 ---> 软件包 libkadm5.x86_64.0.1.15.1-8.el7 将被 升级 ---> 软件包 libkadm5.x86_64.0.1.15.1-19.el7 将被 更新 --> 正在检查事务 ---> 软件包 krb5-devel.x86_64.0.1.15.1-8.el7 将被 升级 ---> 软件包 krb5-devel.x86_64.0.1.15.1-19.el7 将被 更新 ---> 软件包 krb5-workstation.x86_64.0.1.15.1-8.el7 将被 升级 ---> 软件包 krb5-workstation.x86_64.0.1.15.1-19.el7 将被 更新 --> 解决依赖关系完成 依赖关系解决 ================================================================================================================================================================================================================== Package 架构 版本 源 大小 ================================================================================================================================================================================================================== 正在安装: krb5-server-ldap x86_64 1.15.1-19.el7 updates 191 k 为依赖而安装: krb5-server x86_64 1.15.1-19.el7 updates 1.0 M 为依赖而更新: krb5-devel x86_64 1.15.1-19.el7 updates 269 k krb5-libs x86_64 1.15.1-19.el7 updates 747 k krb5-workstation x86_64 1.15.1-19.el7 updates 814 k libkadm5 x86_64 1.15.1-19.el7 updates 175 k 事务概要 ================================================================================================================================================================================================================== 安装 1 软件包 (+1 依赖软件包) 升级 ( 4 依赖软件包) 总下载量:3.2 M Downloading packages: Delta RPMs reduced 2.0 M of updates to 728 k (63% saved) (1/6): krb5-devel-1.15.1-8.el7_1.15.1-19.el7.x86_64.drpm | 153 kB 00:00:00 (2/6): krb5-libs-1.15.1-8.el7_1.15.1-19.el7.x86_64.drpm | 214 kB 00:00:00 (3/6): krb5-workstation-1.15.1-8.el7_1.15.1-19.el7.x86_64.drpm | 236 kB 00:00:00 (4/6): libkadm5-1.15.1-8.el7_1.15.1-19.el7.x86_64.drpm | 126 kB 00:00:00 (5/6): krb5-server-ldap-1.15.1-19.el7.x86_64.rpm | 191 kB 00:00:00 (6/6): krb5-server-1.15.1-19.el7.x86_64.rpm | 1.0 MB 00:00:00 Finishing delta rebuilds of 2 package(s) (989 k) ------------------------------------------------------------------------------------------------------------------------------------------------------------------------------------------------------------------ 总计 1.8 MB/s | 1.9 MB 00:00:01 Running transaction check Running transaction test Transaction test succeeded Running transaction 正在更新 : krb5-libs-1.15.1-19.el7.x86_64 1/10 正在更新 : libkadm5-1.15.1-19.el7.x86_64 2/10 正在安装 : krb5-server-1.15.1-19.el7.x86_64 3/10 正在安装 : krb5-server-ldap-1.15.1-19.el7.x86_64 4/10 正在更新 : krb5-devel-1.15.1-19.el7.x86_64 5/10 正在更新 : krb5-workstation-1.15.1-19.el7.x86_64 6/10 清理 : krb5-workstation-1.15.1-8.el7.x86_64 7/10 清理 : krb5-devel-1.15.1-8.el7.x86_64 8/10 清理 : libkadm5-1.15.1-8.el7.x86_64 9/10 清理 : krb5-libs-1.15.1-8.el7.x86_64 10/10 验证中 : krb5-devel-1.15.1-19.el7.x86_64 1/10 验证中 : krb5-server-1.15.1-19.el7.x86_64 2/10 验证中 : krb5-workstation-1.15.1-19.el7.x86_64 3/10 验证中 : libkadm5-1.15.1-19.el7.x86_64 4/10 验证中 : krb5-libs-1.15.1-19.el7.x86_64 5/10 验证中 : krb5-server-ldap-1.15.1-19.el7.x86_64 6/10 验证中 : krb5-devel-1.15.1-8.el7.x86_64 7/10 验证中 : krb5-workstation-1.15.1-8.el7.x86_64 8/10 验证中 : krb5-libs-1.15.1-8.el7.x86_64 9/10 验证中 : libkadm5-1.15.1-8.el7.x86_64 10/10 已安装: krb5-server-ldap.x86_64 0:1.15.1-19.el7 作为依赖被安装: krb5-server.x86_64 0:1.15.1-19.el7 作为依赖被升级: krb5-devel.x86_64 0:1.15.1-19.el7 krb5-libs.x86_64 0:1.15.1-19.el7 krb5-workstation.x86_64 0:1.15.1-19.el7 libkadm5.x86_64 0:1.15.1-19.el7 完毕!
【注意】:安装好kerberos后不要急于配置,先安装配置LDAP后在配置kerberos会比较好
3.3、安装cyrus-sasl
执行命令:
yum install cyrus-sasl-gssapi cyrus-sasl-plain cyrus-sasl cyrus-sasl-scram cyrus-sasl-lib cyrus-sasl-md5
【注意】:不要安装cyrus-sasl-ldap,否则ldap启动会出错
执行过程:
[root@duke yum.repos.d]# yum install cyrus-sasl-gssapi cyrus-sasl-plain cyrus-sasl cyrus-sasl-scram cyrus-sasl-lib cyrus-sasl-md5 已加载插件:fastestmirror, langpacks Loading mirror speeds from cached hostfile 正在解决依赖关系 --> 正在检查事务 ---> 软件包 cyrus-sasl.x86_64.0.2.1.26-21.el7 将被 升级 ---> 软件包 cyrus-sasl.x86_64.0.2.1.26-23.el7 将被 更新 ---> 软件包 cyrus-sasl-gssapi.x86_64.0.2.1.26-21.el7 将被 升级 ---> 软件包 cyrus-sasl-gssapi.x86_64.0.2.1.26-23.el7 将被 更新 ---> 软件包 cyrus-sasl-lib.x86_64.0.2.1.26-21.el7 将被 升级 ---> 软件包 cyrus-sasl-lib.x86_64.0.2.1.26-23.el7 将被 更新 ---> 软件包 cyrus-sasl-md5.x86_64.0.2.1.26-21.el7 将被 升级 ---> 软件包 cyrus-sasl-md5.x86_64.0.2.1.26-23.el7 将被 更新 ---> 软件包 cyrus-sasl-plain.x86_64.0.2.1.26-21.el7 将被 升级 ---> 软件包 cyrus-sasl-plain.x86_64.0.2.1.26-23.el7 将被 更新 ---> 软件包 cyrus-sasl-scram.x86_64.0.2.1.26-21.el7 将被 升级 ---> 软件包 cyrus-sasl-scram.x86_64.0.2.1.26-23.el7 将被 更新 --> 解决依赖关系完成 依赖关系解决 ================================================================================================================================================================================================================== Package 架构 版本 源 大小 ================================================================================================================================================================================================================== 正在更新: cyrus-sasl x86_64 2.1.26-23.el7 base 88 k cyrus-sasl-gssapi x86_64 2.1.26-23.el7 base 41 k cyrus-sasl-lib x86_64 2.1.26-23.el7 base 155 k cyrus-sasl-md5 x86_64 2.1.26-23.el7 base 57 k cyrus-sasl-plain x86_64 2.1.26-23.el7 base 39 k cyrus-sasl-scram x86_64 2.1.26-23.el7 base 43 k 事务概要 ================================================================================================================================================================================================================== 升级 6 软件包 总下载量:423 k Is this ok [y/d/N]: y Downloading packages: No Presto metadata available for base (1/6): cyrus-sasl-2.1.26-23.el7.x86_64.rpm | 88 kB 00:00:00 (2/6): cyrus-sasl-gssapi-2.1.26-23.el7.x86_64.rpm | 41 kB 00:00:00 (3/6): cyrus-sasl-md5-2.1.26-23.el7.x86_64.rpm | 57 kB 00:00:00 (4/6): cyrus-sasl-lib-2.1.26-23.el7.x86_64.rpm | 155 kB 00:00:00 (5/6): cyrus-sasl-plain-2.1.26-23.el7.x86_64.rpm | 39 kB 00:00:00 (6/6): cyrus-sasl-scram-2.1.26-23.el7.x86_64.rpm | 43 kB 00:00:00 ------------------------------------------------------------------------------------------------------------------------------------------------------------------------------------------------------------------ 总计 1.5 MB/s | 423 kB 00:00:00 Running transaction check Running transaction test Transaction test succeeded Running transaction 正在更新 : cyrus-sasl-lib-2.1.26-23.el7.x86_64 1/12 正在更新 : cyrus-sasl-md5-2.1.26-23.el7.x86_64 2/12 正在更新 : cyrus-sasl-plain-2.1.26-23.el7.x86_64 3/12 正在更新 : cyrus-sasl-2.1.26-23.el7.x86_64 4/12 正在更新 : cyrus-sasl-gssapi-2.1.26-23.el7.x86_64 5/12 正在更新 : cyrus-sasl-scram-2.1.26-23.el7.x86_64 6/12 清理 : cyrus-sasl-scram-2.1.26-21.el7.x86_64 7/12 清理 : cyrus-sasl-gssapi-2.1.26-21.el7.x86_64 8/12 清理 : cyrus-sasl-2.1.26-21.el7.x86_64 9/12 清理 : cyrus-sasl-plain-2.1.26-21.el7.x86_64 10/12 清理 : cyrus-sasl-md5-2.1.26-21.el7.x86_64 11/12 清理 : cyrus-sasl-lib-2.1.26-21.el7.x86_64 12/12 验证中 : cyrus-sasl-md5-2.1.26-23.el7.x86_64 1/12 验证中 : cyrus-sasl-plain-2.1.26-23.el7.x86_64 2/12 验证中 : cyrus-sasl-2.1.26-23.el7.x86_64 3/12 验证中 : cyrus-sasl-lib-2.1.26-23.el7.x86_64 4/12 验证中 : cyrus-sasl-gssapi-2.1.26-23.el7.x86_64 5/12 验证中 : cyrus-sasl-scram-2.1.26-23.el7.x86_64 6/12 验证中 : cyrus-sasl-scram-2.1.26-21.el7.x86_64 7/12 验证中 : cyrus-sasl-gssapi-2.1.26-21.el7.x86_64 8/12 验证中 : cyrus-sasl-md5-2.1.26-21.el7.x86_64 9/12 验证中 : cyrus-sasl-plain-2.1.26-21.el7.x86_64 10/12 验证中 : cyrus-sasl-lib-2.1.26-21.el7.x86_64 11/12 验证中 : cyrus-sasl-2.1.26-21.el7.x86_64 12/12 更新完毕: cyrus-sasl.x86_64 0:2.1.26-23.el7 cyrus-sasl-gssapi.x86_64 0:2.1.26-23.el7 cyrus-sasl-lib.x86_64 0:2.1.26-23.el7 cyrus-sasl-md5.x86_64 0:2.1.26-23.el7 cyrus-sasl-plain.x86_64 0:2.1.26-23.el7 cyrus-sasl-scram.x86_64 0:2.1.26-23.el7 完毕!
四、安装openLDAP
4.1、卸载OpenLDAP
0.1 停止服务
service slapd stop
0.2 卸载程序
yum remove -y openldap-servers openldap-devel openldap-clients compat-openldap
0.3 备份文件
如果不是第一次安装,有部分文件是需要备份的,否则在第二次安装时,将不会被安装,第二次安装时,需要将下面备份文件进行恢复
mkdir -p /etc/openldap_bak cp -r /etc/openldap/certs/ /etc/openldap_bak cp /etc/openldap/ldap.conf /etc/openldap_bak
0.4 删除文件
rm -rf /etc/openldap
4.1.安装openLDAP
执行命令:
yum install openldap-clients openldap-servers openldap-devel compat-openldap -y
过程如下:
[root@duke yum.repos.d]# yum install openldap-clients openldap-servers openldap-devel compat-openldap -y 已加载插件:fastestmirror, langpacks Loading mirror speeds from cached hostfile 软件包 1:compat-openldap-2.3.43-5.el7.x86_64 已安装并且是最新版本 正在解决依赖关系 --> 正在检查事务 ---> 软件包 openldap-clients.x86_64.0.2.4.44-15.el7_5 将被 安装 --> 正在处理依赖关系 openldap(x86-64) = 2.4.44-15.el7_5,它被软件包 openldap-clients-2.4.44-15.el7_5.x86_64 需要 ---> 软件包 openldap-devel.x86_64.0.2.4.44-15.el7_5 将被 安装 --> 正在处理依赖关系 cyrus-sasl-devel(x86-64),它被软件包 openldap-devel-2.4.44-15.el7_5.x86_64 需要 ---> 软件包 openldap-servers.x86_64.0.2.4.44-15.el7_5 将被 安装 --> 正在检查事务 ---> 软件包 cyrus-sasl-devel.x86_64.0.2.1.26-23.el7 将被 安装 ---> 软件包 openldap.x86_64.0.2.4.44-5.el7 将被 升级 ---> 软件包 openldap.x86_64.0.2.4.44-15.el7_5 将被 更新 --> 解决依赖关系完成 依赖关系解决 ================================================================================================================================================================================================================== Package 架构 版本 源 大小 ================================================================================================================================================================================================================== 正在安装: openldap-clients x86_64 2.4.44-15.el7_5 updates 190 k openldap-devel x86_64 2.4.44-15.el7_5 updates 803 k openldap-servers x86_64 2.4.44-15.el7_5 updates 2.2 M 为依赖而安装: cyrus-sasl-devel x86_64 2.1.26-23.el7 base 310 k 为依赖而更新: openldap x86_64 2.4.44-15.el7_5 updates 355 k 事务概要 ================================================================================================================================================================================================================== 安装 3 软件包 (+1 依赖软件包) 升级 ( 1 依赖软件包) 总下载量:3.8 M Downloading packages: Delta RPMs reduced 355 k of updates to 175 k (50% saved) (1/5): openldap-2.4.44-5.el7_2.4.44-15.el7_5.x86_64.drpm | 175 kB 00:00:00 (2/5): openldap-clients-2.4.44-15.el7_5.x86_64.rpm | 190 kB 00:00:00 (3/5): cyrus-sasl-devel-2.1.26-23.el7.x86_64.rpm | 310 kB 00:00:00 (4/5): openldap-devel-2.4.44-15.el7_5.x86_64.rpm | 803 kB 00:00:00 (5/5): openldap-servers-2.4.44-15.el7_5.x86_64.rpm | 2.2 MB 00:00:00 ------------------------------------------------------------------------------------------------------------------------------------------------------------------------------------------------------------------ 总计 8.1 MB/s | 3.6 MB 00:00:00 Running transaction check Running transaction test Transaction test succeeded Running transaction 正在更新 : openldap-2.4.44-15.el7_5.x86_64 1/6 正在安装 : cyrus-sasl-devel-2.1.26-23.el7.x86_64 2/6 正在安装 : openldap-devel-2.4.44-15.el7_5.x86_64 3/6 正在安装 : openldap-servers-2.4.44-15.el7_5.x86_64 4/6 正在安装 : openldap-clients-2.4.44-15.el7_5.x86_64 5/6 清理 : openldap-2.4.44-5.el7.x86_64 6/6 验证中 : openldap-servers-2.4.44-15.el7_5.x86_64 1/6 验证中 : openldap-clients-2.4.44-15.el7_5.x86_64 2/6 验证中 : openldap-devel-2.4.44-15.el7_5.x86_64 3/6 验证中 : cyrus-sasl-devel-2.1.26-23.el7.x86_64 4/6 验证中 : openldap-2.4.44-15.el7_5.x86_64 5/6 验证中 : openldap-2.4.44-5.el7.x86_64 6/6 已安装: openldap-clients.x86_64 0:2.4.44-15.el7_5 openldap-devel.x86_64 0:2.4.44-15.el7_5 openldap-servers.x86_64 0:2.4.44-15.el7_5 作为依赖被安装: cyrus-sasl-devel.x86_64 0:2.1.26-23.el7 作为依赖被升级: openldap.x86_64 0:2.4.44-15.el7_5 完毕!
4.2、查看安装的版本
4.2.1、查看kerberos
rpm -qa krb5-server-ldap
执行过程如下:
[root@hzw ~]# rpm -qa krb5-server-ldap
krb5-server-ldap-1.15.1-19.el7.x86_64
4.2.1、查看OpenLDAP
rpm -qa openldap
执行过程如下:
[root@hzw ~]# rpm -qa openldap
openldap-2.4.44-15.el7_5.x86_64
4.3、打开防火墙上的LDAP端口
LDAP服务器已配置并运行。 打开防火墙上的LDAP端口,以便外部客户端可以连接:
systemctl disable firewall systemctl stop firewall
4.4、测试LDAP连接
测试与ldapwhoami的LDAP连接,该连接应该返回我们连接的用户名:
ldapwhoami -H ldap:// -x
[root@duke ~]# ldapwhoami -H ldap:// -x
anonymous
4.5、检查安装状态
ldapsearch -Q -LLL -Y EXTERNAL -H ldapi:/// -b cn=config dn
过程如下:
[root@duke ~]# ldapsearch -Q -LLL -Y EXTERNAL -H ldapi:/// -b cn=config dn
dn: cn=configdn: cn=module{0},cn=config
dn: cn=schema,cn=config
dn: cn={0}core,cn=schema,cn=config
dn: cn={1}cosine,cn=schema,cn=config
dn: cn={2}nis,cn=schema,cn=config
dn: cn={3}inetorgperson,cn=schema,cn=config
dn: olcBackend={0}mdb,cn=config
dn: olcDatabase={-1}frontend,cn=config
dn: olcDatabase={0}config,cn=config
dn: olcDatabase={1}mdb,cn=config
内容说明:
| 说明 | |
|---|---|
| cn=config | 全局配置 |
| cn=module{0},cn=config | 一个动态加载的模块 |
| cn=schema,cn=config | 包含硬编码的系统级模式 |
| cn={0}core,cn=schema,cn=config | 硬编码内核模式 |
| cn={1}cosine,cn=schema,cn=config | cosine 模式 |
| cn={2}nis,cn=schema,cn=config | nis 模式 |
| cn={3}inetorgperson,cn=schema,cn=config | inetorgperson模式 |
| olcBackend={0}mdb,cn=config | 后端,mdb存储数据库 |
| olcDatabase={-1}frontend,cn=config | 前端数据库,默认设置为其他数据库 |
| olcDatabase={0}config,cn=config | slapd配置数据库(cn = config) |
| olcDatabase={1}mdb,cn=config | 你的数据库实例 (dc=example,dc=com) |
4.6、LDAP操作(知识点,非环境搭建内容)
此时LDAP只有cn=admin,dc=example,dc=com这个用户存在(第五章节会说明),此时LDAP还没有真正能够进行使用,只是一个空的平台。所以需要进行节点、用户存储、组存储、用户等信息的创建。
该章节会针对这些进行相关说明,该内容是知识点,不是部署重要环节,如果只是部署环境,可以跳过该章节,在“第六章”会做部署整合相关的内容说明。
4.6.1、变更数据库
为了LDAP能够真正使用,还需要创建以下内容:
| 序列 | 分类 | 名称 | |
|---|---|---|---|
| 1 | 用户节点 | People | 一个存储用户信息的节点,用户信息都会存储在该节点,例如:han |
| 2 | 组节点 | Groups | 一个存储组信息的节点,组信息都会存储在该节点,例如:LDAPGroup |
| 3 | 组 | LDAPGroup | 创建一个LDAP的用户组 |
| 4 | 用户 | han | 创建一个属于LDAPGroup组的用户 |
操作过程如下:
-
创建一个LDIF文件,该文件用于创建上面表单中的内容,文件可以叫ldap_init.ldif
root@yita-211:~# cd /home/
root@yita-211:/home# mkdir ldap
root@yita-211:/home# cd ldap
root@yita-211:/home# vi ldap_init.ldif -
在ldap_init.ldif文件中添加以下内容
dn: ou=people,dc=example,dc=com objectClass: organizationalUnit ou: people dn: ou=Groups,dc=example,dc=com objectClass: organizationalUnit ou: Groups dn: cn=LDAPGroup,ou=Groups,dc=example,dc=com objectClass: posixGroup cn: LDAPGroup gidNumber: 5000 dn: uid=han,ou=people,dc=example,dc=com objectClass: inetOrgPerson objectClass: posixAccount objectClass: shadowAccount uid: han sn: zhiwei givenName: Han cn: Han ZhiWei displayName: Han ZhiWei uidNumber: 10000 gidNumber: 5000 userPassword: hanzhiwei gecos: Han ZhiWei loginShell: /bin/bash homeDirectory: /home/ldap/han
【注意】:文件中的uidNumber、gidNumber这2个值不能和系统中的已经存在的值冲突,所以最好采用高数值来进行区分。
相关的值可以在/etc/passwd和/etc/group文件中进行查询
- 将用户信息加入到LDAP中
ldapadd -x -D cn=admin,dc=example,dc=com -W -f ldap_init.ldif
过程如下:
root@yita-211:/home/ldap# ls
ldap_init.ldif
root@yita-211:/home/ldap# ldapadd -x -D cn=admin,dc=example,dc=com -W -f ldap_init.ldif
Enter LDAP Password:
adding new entry “ou=people,dc=example,dc=com”adding new entry “ou=Groups,dc=example,dc=com”
adding new entry “cn=LDAPGroup,ou=Groups,dc=example,dc=com”
adding new entry “uid=han,ou=people,dc=example,dc=com”
4.6.2、检查节点、组、用户是否添加正确
ldapsearch -x -LLL -b dc=example,dc=com 'uid=han' cn gidNumber
过程如下:
root@yita-211:/home/ldap# ldapsearch -x -LLL -b dc=example,dc=com ‘uid=han’ cn gidNumber
dn: uid=han,ou=people,dc=example,dc=com
cn: Han ZhiWei
gidNumber: 5000
指令说明:
| 参数 | |
|---|---|
| -x | “简单”绑定; 不会使用默认的SASL方法 |
| -LLL | 禁用打印无关信息 |
| uid=han | 用于查找han用户的“过滤器” |
| cn gidNumber | 请求显示某些属性(默认为显示所有属性) |
4.6.3、增加支持的模式(add schema)
默认情况下安装完LDAP是只支持 cosine、nis、inetorgperson 这3种模式,如果要新增就需要自行添加,例如:本文所要涉及的kerberos。
由于后续第6章节,需要讲述kerberos和LDAP的整合,其中会涉及到在LDAP中增加kerberos模式,所以此处就不再赘述。相关知识点,请直接查看6.1、LDAP增加kerberos模式(schema)章节
五、安装和配置phpLDAPadmin Web界面
5.1、下载安装phpLDAPadmin
5.1.1、下载phpLDAPadmin
http://sourceforge.net/projects/phpldapadmin/files/phpldapadmin-php5/1.2.3/phpldapadmin-1.2.3.zip/download
5.1.2、安装phpLDAPadmin
将下载的phpldapadmin-1.2.3.zip上传到服务器,执行以下命令
unzip phpldapadmin-1.2.3.zip mv phpldapadmin-1.2.3 /var/www/html/phpldapadmin
5.2、配置phpLDAPadmin
安装phpLDAPadmin应用程序,启用必要的Apache配置,并重新加载Apache。
Web服务器配置为提供应用程序,需要进行一些更改。 需要将phpLDAPadmin配置为使用的域,而不是自动填充LDAP登录信息。
需要修改/etc/phpldapadmin/config.php配置文件
cd /var/www/html/phpldapadmin cp config.php.example config.php.example.bak mv config.php.example config.php vim /var/www/html/phpldapadmin/config/config.php
-
配置LDAP服务器–标识
找到 $servers->setValue(‘server’,’name’,’My LDAP Server’); 这一行,修改第三个参数,如下:
$servers->setValue(‘server’,’name’,’YITA LDAP Server’); -
配置LDAP服务器–IP
找到 $servers->setValue(‘server’,’host’,’127.0.0.1′); 这一行,修改第三个参数,如下:
$servers->setValue(‘server’,’host’,’192.168.0.2′); - 配置LDAP服务器–域名
【注意】:
该配置告诉phpLDAPadmin LDAP层次结构的根目录,这是基于重新配置slapd包时输入的值。
前面slapd配置是example,因此在这里配置example.com
需要将每个域组件(不是一个点)放入dc= notation中将其转换为LDAP语法
找到 $servers->setValue(‘server’,’base’,array(‘dc=example,dc=com’)); 这一行,修改第三个参数,如下:
$servers->setValue(‘server’,’base’,array(‘dc=example,dc=com’)); -
配置LDAP服务器–端口
默认是不配置的,只需将去掉注释即可找到 //$servers->setValue(‘server’,’port’,389); 这一行,去掉注释,如下:
$servers->setValue(‘server’,’port’,389); -
配置LDAP服务器–其他服务器
【注意】:
如果只是本机使用LDAP,不使用其他服务器的话,请注释下面配置。
到文件最后部分,找到下面内容,其后的所有参数均注释掉。************************************************************************** * If you want to configure additional LDAP servers, do so below. * * Remove the commented lines and use this section as a template for all * * your other LDAP servers. * **************************************************************************
注释内容如下:
/* $servers->newServer('ldap_pla'); $servers->setValue('server','name','LDAP Server'); $servers->setValue('server','host','192.168.0.2'); $servers->setValue('server','port',389); $servers->setValue('server','base',array('dc=example,dc=com')); $servers->setValue('login','auth_type','cookie'); $servers->setValue('login','bind_id',''); $servers->setValue('login','bind_pass',''); $servers->setValue('server','tls',false); # SASL auth $servers->setValue('login','auth_type','sasl'); $servers->setValue('sasl','mech','GSSAPI'); $servers->setValue('sasl','realm','EXAMPLE.COM'); $servers->setValue('sasl','authz_id',null); $servers->setValue('sasl','authz_id_regex','/^uid=([^,]+)(.+)/i'); $servers->setValue('sasl','authz_id_replacement','$1'); $servers->setValue('sasl','props',null); $servers->setValue('appearance','password_hash','md5'); $servers->setValue('login','attr','dn'); $servers->setValue('login','fallback_dn',false); $servers->setValue('login','class',null); $servers->setValue('server','read_only',false); $servers->setValue('appearance','show_create',true); $servers->setValue('auto_number','enable',true); $servers->setValue('auto_number','mechanism','search'); $servers->setValue('auto_number','search_base',null); $servers->setValue('auto_number','min',array('uidNumber'=>1000,'gidNumber'=>500)); $servers->setValue('auto_number','dn',null); $servers->setValue('auto_number','pass',null); $servers->setValue('login','anon_bind',true); $servers->setValue('custom','pages_prefix','custom_'); $servers->setValue('unique','attrs',array('mail','uid','uidNumber')); $servers->setValue('unique','dn',null); $servers->setValue('unique','pass',null); $servers->setValue('server','visible',true); $servers->setValue('login','timeout',30); $servers->setValue('server','branch_rename',false); $servers->setValue('server','custom_sys_attrs',array('passwordExpirationTime','passwordAllowChangeTime')); $servers->setValue('server','custom_attrs',array('nsRoleDN','nsRole','nsAccountLock')); $servers->setValue('server','force_may',array('uidNumber','gidNumber','sambaSID')); */
5.3、登陆phpLDAPadmin
此时phpldapadmin可以访问但可能不能登录,这个和系统SELinux有关,如果SELinux关闭的话登录时候会有一个错误:
error Unable to connect to LDAP server Cloud-Lab.Com error: Can't contact LDAP server (-1) for user error Failed to Authenticate to server Invalid Username or Password.
打开下面配置即可,操作过程如下:
[root@localhost ~]# getsebool httpd_can_connect_ldap
httpd_can_connect_ldap –> off
[root@localhost ~]# setsebool -P httpd_can_connect_ldap on
[root@localhost ~]# getsebool httpd_can_connect_ldap
httpd_can_connect_ldap –> on
在登录前,必须保证用户电脑和LDAP服务器同属于一个域当中,并配置hosts文件。
例子:以中兴环境为例
| 说明 | IP地址 |
|---|---|
| LDAP服务器 | 192.168.0.2 |
| 用户电脑 | 10.47.101.24 |
| 网关 | 10.47.101.1 |
登陆地址如下:
http://duke.com/phpldapadmin
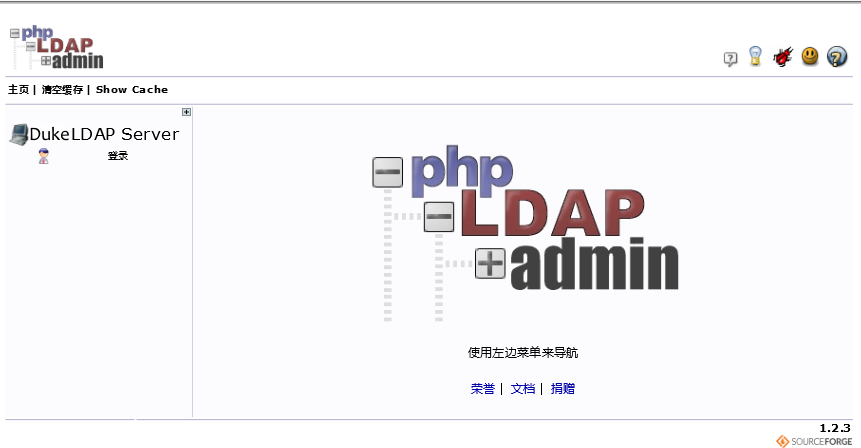
如果没有配置hosts文件,也可以直接使用IP地址进行登录:
http://192.168.0.2/phpldapadmin
登陆页面如下:

用户登录:
点击页面左侧登录按钮后,页面如下:


登录DN是您将要使用的用户名。
包含:帐户名称作为cn=部分,服务器选择的域名分为dc=部分,在安装过程中设置的默认管理员帐户称为admin ,因此在我们的示例中,我们将键入以下内容:
cn=admin,dc=example,dc=com
设置页面如下:


登录成功后页面如下: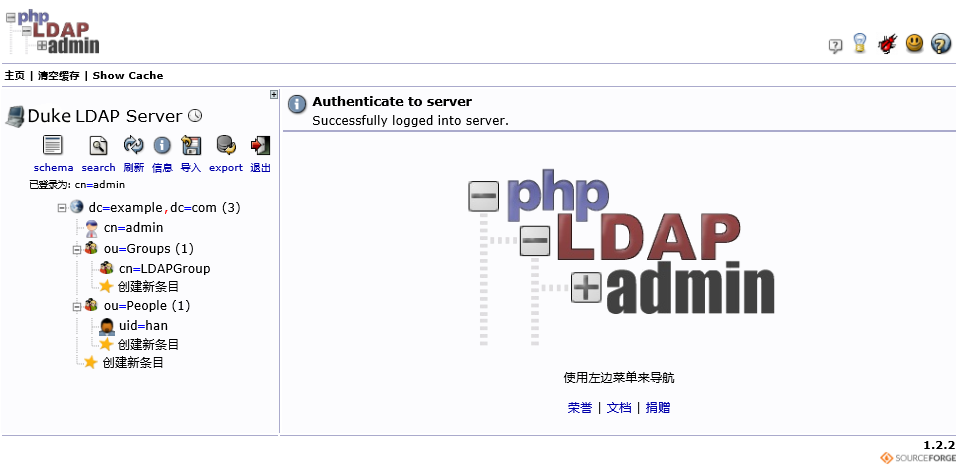

六、kerberos和LDAP整合配置
6.1、配置LDAP的HDB库
rm -rf /var/lib/ldap/* cp /usr/share/openldap-servers/DB_CONFIG.example /var/lib/ldap/DB_CONFIG chown -R ldap.ldap /var/lib/ldap
1、在2.4以前的版本中,OpenLDAP 使用 slapd.conf 配置文件来进行服务器的配置
2、2.4开始则使用 slapd.d 目录保存细分后的各种配置,其数据存储位置即目录 /etc/openldap/slapd.d
3、尽管数据文件是透明格式的,还是建议使用 ldapadd, ldapdelete, ldapmodify 等命令来修改,而不是直接编辑。
6.2、LDAP增加kerberos模式(schema)
存在2中添加方式
6.2.1、LDAP增加kerberos schema文件
解压kerberos.schema.gz,添加到LDAP的schema存储目录
gzip -d /usr/share/doc/krb5-kdc-ldap/kerberos.schema.gz cp /usr/share/doc/krb5-kdc-ldap/kerberos.schema /etc/ldap/schema/
6.2.2、LDAP增加kerberos模式一(该模式是2.4版本后官方推荐方法)
- 新建一个schema转换文件:kerberos_schema_convert.conf
vim kerberos_schema_convert.conf
- 在kerberos_schema_convert.conf文件中添加以下内容:
include /etc/openldap/schema/core.schema include /etc/openldap/schema/collective.schema include /etc/openldap/schema/corba.schema include /etc/openldap/schema/cosine.schema include /etc/openldap/schema/duaconf.schema include /etc/openldap/schema/dyngroup.schema include /etc/openldap/schema/inetorgperson.schema include /etc/openldap/schema/java.schema include /etc/openldap/schema/misc.schema include /etc/openldap/schema/nis.schema include /etc/openldap/schema/openldap.schema include /etc/openldap/schema/ppolicy.schema include /etc/openldap/schema/kerberos.schema
- 创建一个临时目录来存放LDIF文件
mkdir -p /home/ldap/tmp
- 使用slapcat来转换schema文件
slapcat -f kerberos_schema_convert.conf -F /home/ldap/tmp -n0 -s "cn={12}kerberos,cn=schema,cn=config" > /home/ldap/tmp/cn=kerberos.ldif【注意】:cn={12}kerberos中的{12}
指的是kerberos_schema_convert.conf文件中“include /etc/openldap/schema/kerberos.schema”信息位置的序号
并且需要(序号-1),序号是以0为起始位过程如下:
[root@duke ldap]# slapcat -f kerberos_schema_convert.conf -F /home/ldap/tmp -n0 -s “cn={12}kerberos,cn=schema,cn=config” > /home/ldap/tmp/cn=kerberos.ldif
[root@duke ldap]# cd tmp
[root@duke tmp]# ls
cn=config cn=config.ldif cn=kerberos.ldif
[root@duke ldap]# cat cn=kerberos.ldif
dn: cn={12}kerberos,cn=schema,cn=config
objectClass: olcSchemaConfig
cn: {12}kerberos
olcAttributeTypes: {0}( 2.16.840.1.113719.1.301.4.1.1 NAME ‘krbPrincipalName
‘ EQUALITY caseExactIA5Match SUBSTR caseExactSubstringsMatch SYNTAX 1.3.6.1
.4.1.1466.115.121.1.26 )
olcAttributeTypes: {1}( 1.2.840.113554.1.4.1.6.1 NAME ‘krbCanonicalName’ EQU
ALITY caseExactIA5Match SUBSTR caseExactSubstringsMatch SYNTAX 1.3.6.1.4.1.
1466.115.121.1.26 SINGLE-VALUE )
……
olcObjectClasses: {11}( 2.16.840.1.113719.1.301.6.17.1 NAME ‘krbTicketPolicy
‘ SUP top STRUCTURAL MUST cn )
structuralObjectClass: olcSchemaConfig
entryUUID: 84374308-66be-1038-8430-576d5315da4e
creatorsName: cn=config
createTimestamp: 20181018011141Z
entryCSN: 20181018011141.878509Z#000000#000#000000
modifiersName: cn=config
modifyTimestamp: 20181018011141Z - 编辑生成的/home/ldap/tmp/cn=kerberos.ldif文件,修改其中属性,删除以下不需要的部分,这部分属性可能不会一样,每次生成的value是肯定不一样,根据情况删除
structuralObjectClass: olcSchemaConfig entryUUID: 84374308-66be-1038-8430-576d5315da4e creatorsName: cn=config createTimestamp: 20181018011141Z entryCSN: 20181018011141.878509Z#000000#000#000000 modifiersName: cn=config modifyTimestamp: 20181018011141Z
- 用ldapadd加载新的schema
ldapadd -Q -Y EXTERNAL -H ldapi:/// -f /home/ldap/tmp/cn=kerberos.ldif
- 查看是否加载成功
ldapsearch -Q -LLL -Y EXTERNAL -H ldapi:/// -b cn=schema,cn=config dn
过程如下:
[root@duke ldap]# ldapsearch -Q -LLL -Y EXTERNAL -H ldapi:/// -b cn=schema,cn=config dn
dn: cn=schema,cn=config
dn: cn={0}core,cn=schema,cn=config
dn: cn={1}cosine,cn=schema,cn=config
dn: cn={2}nis,cn=schema,cn=config
dn: cn={3}inetorgperson,cn=schema,cn=config
dn: cn={4}kerberos,cn=schema 新增加成功的keberos模式
6.2.2、LDAP增加kerberos模式二(该模式是2.4版本前方法,2.4之后版本也可以用)推荐
【注意】:
1、openldap在第一次安装完成后,/etc/openldap/目录会有以下文件
certs check_password.conf ldap.conf schema slapd.d
2、如果卸载openLDAP,并删除/etc/openldap/目录下所有内容,在第二次安装时,会少以下内容
certs ldap.conf
3、需要备份certs和ldap.conf的内容,否则会导致openLDAP无法正常启动
6.2.2.1、备份相关文件
mkdir /etc/openldap/bak cp -r /etc/openldap/certs/ /etc/openldap/bak cp /etc/openldap/ldap.conf /etc/openldap/bak cp -rf /etc/openldap/slapd.d /etc/openldap/slapd.d.bak
6.2.2.2、配置增加kerberos.schema
1、增加kerberos.schema配置文件到openLDAP
cp /usr/share/doc/krb5-server-ldap-1.15.1/kerberos.schema /etc/openldap/schema/
2、配置openLDAP的配置文件
touch /etc/openldap/slapd.conf cat >> /etc/openldap/slapd.conf <<EOF include /etc/openldap/schema/core.schema include /etc/openldap/schema/cosine.schema include /etc/openldap/schema/corba.schema include /etc/openldap/schema/duaconf.schema include /etc/openldap/schema/dyngroup.schema include /etc/openldap/schema/inetorgperson.schema include /etc/openldap/schema/java.schema include /etc/openldap/schema/misc.schema include /etc/openldap/schema/nis.schema include /etc/openldap/schema/openldap.schema include /etc/openldap/schema/ppolicy.schema include /etc/openldap/schema/collective.schema include /etc/openldap/schema/kerberos.schema pidfile /var/run/openldap/slapd.pid argsfile /var/run/openldap/slapd.args EOF
3、更新配置
slaptest -f /etc/openldap/slapd.conf -F /etc/openldap/slapd.d chown -R ldap:ldap /etc/openldap/slapd.d && chmod -R 700 /etc/openldap/slapd.d
过程如下:
[root@duke openldap]# slaptest -f /etc/openldap/slapd.conf -F /etc/openldap/slapd.d
config file testing succeeded
[root@duke openldap]# chown -R ldap:ldap /etc/openldap/slapd.d && chmod -R 700 /etc/openldap/slapd.d
4、修改默认配置
需要注释ldap.conf中的TLS_CACERTDIR /etc/openldap/certs内容
vim /etc/openldap/lapd.conf
过程如下:
将
# # LDAP Defaults # # See ldap.conf(5) for details # This file should be world readable but not world writable. #BASE dc=example,dc=com #URI ldap://ldap.example.com ldap://ldap-master.example.com:666 #SIZELIMIT 12 #TIMELIMIT 15 #DEREF never TLS_CACERTDIR /etc/openldap/certs # Turning this off breaks GSSAPI used with krb5 when rdns = false SASL_NOCANON on
修改为
# # LDAP Defaults # # See ldap.conf(5) for details # This file should be world readable but not world writable. #BASE dc=example,dc=com #URI ldap://ldap.example.com ldap://ldap-master.example.com:666 #SIZELIMIT 12 #TIMELIMIT 15 #DEREF never #TLS_CACERTDIR /etc/openldap/certs # Turning this off breaks GSSAPI used with krb5 when rdns = false SASL_NOCANON on
5、启动openLDAP
service slapd start
6、检查启动状态
ps aux | grep slapd | grep -v grep netstat -tunlp | grep :389
执行过程如下:
[root@duke openldap]# ps aux | grep slapd | grep -v grep
ldap 18081 0.0 1.7 517348 32988 ? Ssl 17:06 0:00 /usr/sbin/slapd -u ldap -h ldapi:/// ldap:///
[root@duke openldap]# netstat -tunlp | grep :389
tcp 0 0 0.0.0.0:389 0.0.0.0: LISTEN 18081/slapd
tcp6 0 0 :::389 ::: LISTEN 18081/slapd
6.2.3、启动失败解决方案
1、启动失败问题1
执行过程:
[root@duke openldap]# service slapd start Redirecting to /bin/systemctl start slapd.service Job for slapd.service failed because the control process exited with error code. See "systemctl status slapd.service" and "journalctl -xe" for details. [root@duke openldap]# journalctl -xe 10月 26 16:59:47 test216 slaptest[17907]: _sasl_plugin_load failed on sasl_auxprop_plug_init for plugin: sql 10月 26 16:59:47 test216 runuser[17906]: pam_unix(runuser:session): session closed for user ldap 10月 26 16:59:47 test216 check-config.sh[17903]: Checking configuration file failed: 10月 26 16:59:47 test216 check-config.sh[17903]: 5bd2d783 ldif_read_file: Permission denied for "/etc/openldap/slapd.d/cn=config/cn=schema/cn={1}cosine.ldif" 10月 26 16:59:47 test216 check-config.sh[17903]: slaptest: bad configuration file! 10月 26 16:59:47 test216 slapcat[17911]: auxpropfunc error invalid parameter supplied 10月 26 16:59:47 test216 slapcat[17911]: _sasl_plugin_load failed on sasl_auxprop_plug_init for plugin: ldapdb 10月 26 16:59:47 test216 slapcat[17911]: ldapdb_canonuser_plug_init() failed in sasl_canonuser_add_plugin(): invalid parameter supplied 10月 26 16:59:47 test216 slapcat[17911]: _sasl_plugin_load failed on sasl_canonuser_init for plugin: ldapdb 10月 26 16:59:47 test216 slapcat[17911]: sql_select option missing 10月 26 16:59:47 test216 slapcat[17911]: auxpropfunc error no mechanism available 10月 26 16:59:47 test216 slapcat[17911]: _sasl_plugin_load failed on sasl_auxprop_plug_init for plugin: sql 10月 26 16:59:47 test216 slapcat[17911]: DIGEST-MD5 common mech free 10月 26 16:59:47 test216 slapd[17918]: @(#) $OpenLDAP: slapd 2.4.44 (May 16 2018 09:55:53) $ [email protected]:/builddir/build/BUILD/openldap-2.4.44/openldap-2.4.44/servers/slapd 10月 26 16:59:47 test216 slapd[17918]: auxpropfunc error invalid parameter supplied 10月 26 16:59:47 test216 slapd[17918]: _sasl_plugin_load failed on sasl_auxprop_plug_init for plugin: ldapdb 10月 26 16:59:47 test216 slapd[17918]: ldapdb_canonuser_plug_init() failed in sasl_canonuser_add_plugin(): invalid parameter supplied 10月 26 16:59:47 test216 slapd[17918]: _sasl_plugin_load failed on sasl_canonuser_init for plugin: ldapdb 10月 26 16:59:47 test216 slapd[17918]: sql_select option missing 10月 26 16:59:47 test216 slapd[17918]: auxpropfunc error no mechanism available 10月 26 16:59:47 test216 slapd[17918]: _sasl_plugin_load failed on sasl_auxprop_plug_init for plugin: sql 10月 26 16:59:47 test216 slapd[17918]: ldif_read_file: Permission denied for "/etc/openldap/slapd.d/cn=config/cn=schema/cn={1}cosine.ldif" 10月 26 16:59:47 test216 slapd[17918]: DIGEST-MD5 common mech free 10月 26 16:59:47 test216 slapd[17918]: slapd stopped. 10月 26 16:59:47 test216 slapd[17918]: connections_destroy: nothing to destroy. 10月 26 16:59:47 test216 systemd[1]: slapd.service: control process exited, code=exited status=1 10月 26 16:59:47 test216 systemd[1]: Failed to start OpenLDAP Server Daemon. -- Subject: Unit slapd.service has failed -- Defined-By: systemd -- Support: http://lists.freedesktop.org/mailman/listinfo/systemd-devel -- -- Unit slapd.service has failed. -- -- The result is failed. 10月 26 16:59:47 test216 systemd[1]: Unit slapd.service entered failed state. 10月 26 16:59:47 test216 systemd[1]: slapd.service failed. 10月 26 16:59:47 test216 polkitd[663]: Unregistered Authentication Agent for unix-process:17887:646403 (system bus name :1.65, object path /org/freedesktop/PolicyKit1/AuthenticationAgent, local
问题在于下面2个关键处
_sasl_plugin_load failed on sasl_canonuser_init for plugin: ldapdb ldapdb_canonuser_plug_init() failed in sasl_canonuser_add_plugin(): invalid parameter supplied
是由于安装了cyrus-sasl-ldap包,导致,实际过程中是不需要该包的,删除该包即可,命令如下:
rpm -e cyrus-sasl-ldap-2.1.26-23.el7.x86_64
2、启动失败问题2
如果通过journalctl -xe查看到有很多以下内容,则表示权限不对:
tlsmc_get_pin: INFO: Please note the extracted key file will not be protected with a PIN any more, however it will be still protected at least by file per
执行以下操作:
chown -R ldap:ldap /etc/openldap chown -R ldap:ldap /var/run/openldap chown -R ldap:ldap /var/lib/ldap
3、启动失败问题3
如果通过slapd -h ldap://127.0.0.1 -d 481查看到有下内容,则表示缺少/etc/openldap/certs目录中的文件,需要将之前备份的certs和ldap.conf恢复:
TLSMC: MozNSS compatibility interception begins. tlsmc_intercept_initialization: INFO: entry options follow: tlsmc_intercept_initialization: INFO: cacertdir = `/etc/openldap/certs' tlsmc_intercept_initialization: INFO: certfile = `OpenLDAP Server' tlsmc_intercept_initialization: INFO: keyfile = `/etc/openldap/certs/password' tlsmc_convert: INFO: trying to open NSS DB with CACertDir = `/etc/openldap/certs'. tlsmc_open_nssdb: INFO: trying to initialize moznss using security dir `/etc/openldap` prefix `certs`. tlsmc_open_nssdb: WARN: could not initialize MozNSS context - error -8015. tlsmc_convert: INFO: cannot open the NSS DB, expecting PEM configuration is present. tlsmc_intercept_initialization: INFO: altered options follow: tlsmc_intercept_initialization: INFO: cacertdir = `/etc/openldap' tlsmc_intercept_initialization: INFO: certfile = `OpenLDAP Server' tlsmc_intercept_initialization: INFO: keyfile = `/etc/openldap/certs/password' tlsmc_intercept_initialization: INFO: successfully intercepted TLS initialization. Continuing with OpenSSL only. TLSMC: MozNSS compatibility interception ends. TLS: could not use certificate `OpenLDAP Server'. TLS: error:02001002:system library:fopen:No such file or directory bss_file.c:402 TLS: error:20074002:BIO routines:FILE_CTRL:system lib bss_file.c:404 TLS: error:140AD002:SSL routines:SSL_CTX_use_certificate_file:system lib ssl_rsa.c:468 5bd16a2e main: TLS init def ctx failed: -1 5bd16a2e slapd destroy: freeing system resources. 5bd16a2e slapd stopped. 5bd16a2e connections_destroy: nothing to destroy.
6.3、配置kerberos
6.3.1、设置/etc/krb5.conf文件
vim /etc/krb5.conf
1、设置libdefaults属性
找到[libdefaults]行,进行以下修改
[libdefaults] default_realm = EXAMPLE.COM # The following krb5.conf variables are only for MIT Kerberos. krb4_config = /etc/krb.conf krb4_realms = /etc/krb.realms kdc_timesync = 1 ccache_type = 4 forwardable = true proxiable = true
修改为
[libdefaults] renew_lifetime = 7d forwardable = true default_realm = EXAMPLE.COM ticket_lifetime = 24h dns_lookup_realm = false dns_lookup_kdc = false default_ccache_name = /tmp/krb5cc_%{uid}
2、设置realms属性
找到[realms]行,进行以下修改
[realms] EXAMPLE.COM = { kdc = 192.168.0.2 admin_server = 192.168.0.2 }
修改为
[realms] EXAMPLE.COM = { admin_server = 192.168.0.2 kdc = 192.168.0.2 max_renewable_life = 30m database_module = openldap_ldapconf supported_enctypes = aes128-cts:normal des3-hmac-sha1:normal arcfour-hmac:normal des-hmac-sha1:normal des-cbc-md5:normal des-cbc-crc:normal }
3、设置domain_realm属性
找到[domain_realm]行,进行以下修改
[domain_realm] .mit.edu = ATHENA.MIT.EDU mit.edu = ATHENA.MIT.EDU .media.mit.edu = MEDIA-LAB.MIT.EDU media.mit.edu = MEDIA-LAB.MIT.EDU .csail.mit.edu = CSAIL.MIT.EDU csail.mit.edu = CSAIL.MIT.EDU .whoi.edu = ATHENA.MIT.EDU whoi.edu = ATHENA.MIT.EDU .stanford.edu = stanford.edu .slac.stanford.edu = SLAC.STANFORD.EDU .toronto.edu = UTORONTO.CA .utoronto.ca = UTORONTO.CA
修改为
[domain_realm] .example.com = EXAMPLE.COM example.com = EXAMPLE.COM kdc.example.com = EXAMPLE.COM client.example.com = EXAMPLE.COM
4、添加以下属性
[logging] default = FILE:/home/ldap/log/krb5libs.log kdc = FILE:/home/ldap/log/krb5kdc.log admin_server = FILE:/home/ldap/log/kadmind.log [dbdefaults] ldap_kerberos_container_dn = cn=kerberos,dc=example,dc=com [dbmodules] openldap_ldapconf = { db_library = kldap ldap_servers = ldapi:// ldap_kerberos_container_dn = cn=kerberos,dc=example,dc=com ldap_kdc_dn = cn=root,dc=example,dc=com ldap_kadmind_dn = cn=root,dc=example,dc=com ldap_service_password_file = /etc/krb5.ldap ldap_conns_per_server = 5 }
1、ldap_kdc_dn 对应 Kerberos 访问 LDAP 数据库时的服务帐号,需要有读权限
2、ldap_kadmind_dn 对应 Kerberos 访问 LDAP 数据库时的管理帐号,需要有读写权限
3、此处为了简单方便,统一用cn=root,dc=example,dc=com一个进行管理
4、ldap_kerberos_container_dn 必须以 ‘cn‘开头
6.2.1、设置/var/kerberos/krb5kdc/kdc.conf文件
在默认情况下supported_enctypes默认使用aes256-cts。由于,JAVA使用aes256-cts验证方式需要安装额外的jar包,推荐不使用。所以需要针对aes256-cts进行修改。
vim /var/kerberos/krb5kdc/kdc.conf
将下面内:
[kdcdefaults] kdc_ports = 88 kdc_tcp_ports = 88 [realms] EXAMPLE.COM = { master_key_type = aes256-cts master_key_type = des-hmac-sha1 default_principal_flags = +preauth acl_file = /var/kerberos/krb5kdc/kadm5.acl dict_file = /usr/share/dict/words admin_keytab = /var/kerberos/krb5kdc/kadm5.keytab supported_enctypes = aes256-cts:normal aes128-cts:normal des3-hmac-sha1:normal arcfour-hmac:normal camellia256-cts:normal camellia128-cts:normal des-hmac-sha1:normal des-cbc-md5:normal des-cbc-crc:normal }
注释:master_key_type = aes256-cts
删除:aes256-cts:normal
[kdcdefaults] kdc_ports = 88 kdc_tcp_ports = 88 [realms] EXAMPLE.COM = { #master_key_type = aes256-cts master_key_type = des-hmac-sha1 default_principal_flags = +preauth acl_file = /var/kerberos/krb5kdc/kadm5.acl dict_file = /usr/share/dict/words admin_keytab = /var/kerberos/krb5kdc/kadm5.keytab supported_enctypes = aes128-cts:normal des3-hmac-sha1:normal arcfour-hmac:normal camellia256-cts:normal camellia128-cts:normal des-hmac-sha1:normal des-cbc-md5:normal des-cbc-crc:normal }
6.3、LDAP增加kerberos用户
6.3.1、创建LDAP数据库(用于后续整合)
1、查看相关默认配置
由于安装LDAP时,使用的是HDB数据库,所以在/etc/openldap/slapd.d/cn=config目录查看olcDatabase={2}hdb.ldif文件中的一些相关默认配置
cat /etc/openldap/slapd.d/cn=config/olcDatabase={2}hdb.ldif
(未执行4.6.1、变更数据库)内容如下:
# AUTO-GENERATED FILE - DO NOT EDIT!! Use ldapmodify. # CRC32 e34ca519 dn: olcDatabase={2}hdb objectClass: olcDatabaseConfig objectClass: olcHdbConfig olcDatabase: {2}hdb olcDbDirectory: /var/lib/ldap olcSuffix: dc=my-domain,dc=com olcRootDN: cn=Manager,dc=my-domain,dc=com olcDbIndex: objectClass eq,pres olcDbIndex: ou,cn,mail,surname,givenname eq,pres,sub structuralObjectClass: olcHdbConfig entryUUID: 9d13466a-6c7c-1038-94b9-edef98ed6f69 creatorsName: cn=config createTimestamp: 20181025083503Z entryCSN: 20181025083503.782735Z#000000#000#000000 modifiersName: cn=config modifyTimestamp: 20181025083503Z
(未执行4.6.1、变更数据库)其中以下内容是下面步骤所需要的关键:
olcSuffix: dc=my-domain,dc=com olcRootDN: cn=Manager,dc=my-domain,dc=com
(执行4.6.1、变更数据库是以下内容)其中以下内容是下面步骤所需要的关键:
olcSuffix: dc=example,dc=com olcRootDN: uid=admin,ou=people,dc=example,dc=com
需要改为,但是不能直接改此处文件,根据后续步骤进行修改
olcSuffix: dc=example,dc=com olcRootDN: uid=ldapadmin,ou=people,dc=example,dc=com
或
olcSuffix: dc=example,dc=com olcRootDN: uid=admin,ou=people,dc=example,dc=com
2、创建数据库信息
创建数据库信息文件modify.ldif
vim /home/ldap/modify.ldif
文件内容如下:
dn: olcDatabase={2}hdb,cn=config changetype: modify replace: olcSuffix olcSuffix: dc=example,dc=com dn: olcDatabase={2}hdb,cn=config changetype: modify replace: olcRootDN # Temporary lines to allow initial setup olcRootDN: uid=ldapadmin,ou=people,dc=example,dc=com dn: olcDatabase={2}hdb,cn=config changetype: modify add: olcRootPW olcRootPW: 12345678 dn: cn=config changetype: modify add: olcAuthzRegexp olcAuthzRegexp: uid=([^,]*),cn=GSSAPI,cn=auth uid=$1,ou=people,dc=example,dc=com dn: olcDatabase={2}hdb,cn=config changetype: modify add: olcAccess # Everyone can read everything olcAccess: {0}to dn.base="" by * read # The ldapadm dn has full write access olcAccess: {1}to * by dn="uid=ldapadmin,ou=people,dc=example,dc=com" by dn="cn=root,dc=example,dc=com" write by * read
3、载入数据库配置信息
ldapmodify -Y EXTERNAL -H ldapi:/// -f /home/ldap/modify.ldif
过程如下:
[root@duke ldap]# ldapmodify -Y EXTERNAL -H ldapi:/// -f /home/ldap/modify.ldif
SASL/EXTERNAL authentication started
SASL username: gidNumber=0+uidNumber=0,cn=peercred,cn=external,cn=auth
SASL SSF: 0
modifying entry “olcDatabase={1}mdb,cn=config”
modifying entry “olcDatabase={1}mdb,cn=config”
modifying entry “olcDatabase={1}mdb,cn=config”
ldap_modify: Inappropriate matching (18)
additional info: modify/add: olcRootPW: no equality matching rule
在执行过程中报错,密码不能够被配置,配置文件编写不对。修改方法如下:
将modify.ldif文件中的下面内容:
dn: olcDatabase={1}mdb,cn=config changetype: modify add: olcRootPW olcRootPW: 12345678
修改为
dn: olcDatabase={1}mdb,cn=config changetype: modify replace: olcRootPW olcRootPW: 12345678
再次执行,过程如下:
[root@duke ldap]# ldapmodify -Y EXTERNAL -H ldapi:/// -f /home/ldap/modify.ldif
SASL/EXTERNAL authentication started
SASL username: gidNumber=0+uidNumber=0,cn=peercred,cn=external,cn=auth
SASL SSF: 0
modifying entry “olcDatabase={1}mdb,cn=config”
modifying entry “olcDatabase={1}mdb,cn=config”
modifying entry “olcDatabase={1}mdb,cn=config”
modifying entry “cn=config”
modifying entry “olcDatabase={1}mdb,cn=config”
6.3.2、创建数据库数据
数据库配置完成,但是没有数据,需要添加数据。
可以手动编写 ldif 文件来导入一些用户和组。
也可以使用 migrationtools 工具来生成 ldif 模板。
此处采用ldif文件配置方法来新增数据。
1、setup.ldif文件
vim /home/ldap/setup.ldif
添加内容如下:
dn: dc=example,dc=com objectClass: top objectClass: dcObject objectclass: organization o: example com dc: example dn: ou=people,dc=example,dc=com objectclass: organizationalUnit ou: people description: Users dn: ou=Groups,dc=example,dc=com objectClass: organizationalUnit ou: Groups dn: uid=ldapadmin,ou=people,dc=example,dc=com objectClass: inetOrgPerson objectClass: posixAccount objectClass: shadowAccount cn: LDAP admin account uid: ldapadmin sn: ldapadmin uidNumber: 10001 gidNumber: 5000 homeDirectory: /home/ldap/ldapadmin loginShell: /bin/bash
2、载入数据
ldapadd -x -D "uid=ldapadmin,ou=people,dc=example,dc=com" -w 12345678 -f /home/ldap/setup.ldif
如果执行过程中报以下错误,是因为在按文档操作过程中,已经按照4.6.1章节创建了数据库数据信息,导致部分数据已经存在,所以无法创建成功。没有按照4.6.1章节操作,直接按照本章节操作是可以成功的。
[root@duke ldap]# ldapadd -x -D "uid=ldapadmin,ou=people,dc=example,dc=com" -w 12345678 -f /home/ldap/setup.ldif adding new entry "dc=example,dc=com" ldap_add: Already exists (68)
为了解决上面问题,setup.ldif文件修改为以下内容:
dn: ou=people,dc=example,dc=com objectclass: organizationalUnit ou: people description: Users dn: ou=Groups,dc=example,dc=com objectClass: organizationalUnit ou: Groups dn: uid=ldapadmin,ou=people,dc=example,dc=com objectClass: inetOrgPerson objectClass: posixAccount objectClass: shadowAccount cn: LDAP admin account uid: ldapadmin sn: ldapadmin uidNumber: 10001 gidNumber: 5000 homeDirectory: /home/ldap/ldapadmin loginShell: /bin/bash
再次执行过程如下:
[root@duke ldap]# ldapadd -x -D "uid=ldapadmin,ou=people,dc=example,dc=com" -w 12345678 -f /home/ldap/setup.ldif adding new entry "uid=ldapadmin,ou=people,dc=example,dc=com"
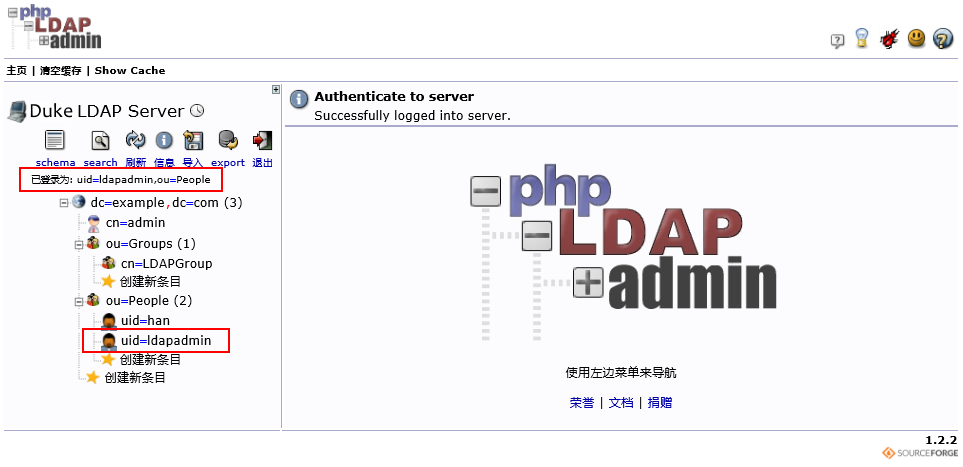
3、验证数据
在http://192.168.0.2/phpldapadmin页面使用uid=ldapadmin,ou=people,dc=example,dc=com用户进行登录,如果登录成功即表示数据库数据添加成功。如下页面:
6.3.3、导入linux系统用户
若要将 /etc/passwd, /etc/shadow, /etc/groups 中生成 ldif 更新 ldap 数据库,就需要用到 migrationtools 工具。
1、安装migrationtools
apt-get install migrationtools
过程如下:
[root@duke ldap]# yum install migrationtools -y 已加载插件:fastestmirror, langpacks base | 3.6 kB 00:00:00 extras | 3.4 kB 00:00:00 updates | 3.4 kB 00:00:00 updates/7/x86_64/primary_db | 6.0 MB 00:00:00 Loading mirror speeds from cached hostfile 正在解决依赖关系 --> 正在检查事务 ---> 软件包 migrationtools.noarch.0.47-15.el7 将被 安装 --> 解决依赖关系完成 依赖关系解决 ================================================================================================================================================================================================================== Package 架构 版本 源 大小 ================================================================================================================================================================================================================== 正在安装: migrationtools noarch 47-15.el7 base 26 k 事务概要 ================================================================================================================================================================================================================== 安装 1 软件包 总下载量:26 k 安装大小:106 k Downloading packages: migrationtools-47-15.el7.noarch.rpm | 26 kB 00:00:00 Running transaction check Running transaction test Transaction test succeeded Running transaction 正在安装 : migrationtools-47-15.el7.noarch 1/1 验证中 : migrationtools-47-15.el7.noarch 1/1 已安装: migrationtools.noarch 0:47-15.el7 完毕!
2、修改默认配置
利用迁移工具生成模板,但是需要先修改默认的配置:
vim /usr/share/migrationtools/migrate_common.ph
将下面内容
# Default DNS domain $DEFAULT_MAIL_DOMAIN = "padl.com"; # Default base $DEFAULT_BASE = "dc=padl,dc=com";
修改为
# Default DNS domain $DEFAULT_MAIL_DOMAIN = "example.com"; # Default base $DEFAULT_BASE = "dc=example,dc=com";
3、生成文件模板
/usr/share/migrationtools/migrate_base.pl > /home/ldap/base.ldif
4、导入命令
根据需求更改上面文件内容,然后执行下面语句,即可把linux用户导入到LDAP中
ldapadd -x -D "uid=ldapadmin,ou=people,dc=example,dc=com" -w 12345678 -f /home/ldap/base.ldif
当然你可能会遇到下面错误,这是因为生成的base.ldif文件中,有已经存在于LDAP的用户信息,所以导无法加载成功。
[root@duke ldap]# ldapadd -x -D “uid=ldapadmin,ou=people,dc=example,dc=com” -w 12345678 -f /home/ldap/base.ldif
adding new entry “dc=example,dc=com”
ldap_add: Already exists (68)
修改方法如下,删除已经存在的用户信息即可,原始内容如下:
dn: dc=example,dc=com dc: example objectClass: top objectClass: domain dn: ou=Services,dc=example,dc=com ou: Services objectClass: top objectClass: organizationalUnit dn: ou=Rpc,dc=example,dc=com ou: Rpc objectClass: top objectClass: organizationalUnit dn: ou=people,dc=example,dc=com ou: people objectClass: top objectClass: organizationalUnit dn: ou=Networks,dc=example,dc=com ou: Networks objectClass: top objectClass: organizationalUnit dn: nisMapName=netgroup.byuser,dc=example,dc=com nismapname: netgroup.byuser objectClass: top objectClass: nisMap dn: ou=Aliases,dc=example,dc=com ou: Aliases objectClass: top objectClass: organizationalUnit dn: ou=Protocols,dc=example,dc=com ou: Protocols objectClass: top objectClass: organizationalUnit dn: ou=Netgroup,dc=example,dc=com ou: Netgroup objectClass: top objectClass: organizationalUnit dn: ou=Group,dc=example,dc=com ou: Group objectClass: top objectClass: organizationalUnit dn: ou=Mounts,dc=example,dc=com ou: Mounts objectClass: top objectClass: organizationalUnit dn: ou=Hosts,dc=example,dc=com ou: Hosts objectClass: top objectClass: organizationalUnit dn: nisMapName=netgroup.byhost,dc=example,dc=com nismapname: netgroup.byhost objectClass: top objectClass: nisMap
修改为
dn: ou=Services,dc=example,dc=com ou: Services objectClass: top objectClass: organizationalUnit dn: ou=Rpc,dc=example,dc=com ou: Rpc objectClass: top objectClass: organizationalUnit dn: ou=Networks,dc=example,dc=com ou: Networks objectClass: top objectClass: organizationalUnit dn: nisMapName=netgroup.byuser,dc=example,dc=com nismapname: netgroup.byuser objectClass: top objectClass: nisMap dn: ou=Aliases,dc=example,dc=com ou: Aliases objectClass: top objectClass: organizationalUnit dn: ou=Protocols,dc=example,dc=com ou: Protocols objectClass: top objectClass: organizationalUnit dn: ou=Netgroup,dc=example,dc=com ou: Netgroup objectClass: top objectClass: organizationalUnit dn: ou=Group,dc=example,dc=com ou: Group objectClass: top objectClass: organizationalUnit dn: ou=Mounts,dc=example,dc=com ou: Mounts objectClass: top objectClass: organizationalUnit dn: ou=Hosts,dc=example,dc=com ou: Hosts objectClass: top objectClass: organizationalUnit dn: nisMapName=netgroup.byhost,dc=example,dc=com nismapname: netgroup.byhost objectClass: top objectClass: nisMap
执行过程如下:
[root@duke ldap]# ldapadd -x -D “uid=ldapadmin,ou=people,dc=example,dc=com” -w 12345678 -f /home/ldap/base.ldif
adding new entry “ou=Services,dc=example,dc=com”
adding new entry “ou=Rpc,dc=example,dc=com”
adding new entry “ou=Networks,dc=example,dc=com”
adding new entry “nisMapName=netgroup.byuser,dc=example,dc=com”
adding new entry “ou=Aliases,dc=example,dc=com”
adding new entry “ou=Protocols,dc=example,dc=com”
adding new entry “ou=Netgroup,dc=example,dc=com”
adding new entry “ou=Group,dc=example,dc=com”
adding new entry “ou=Mounts,dc=example,dc=com”
adding new entry “ou=Hosts,dc=example,dc=com”
adding new entry “nisMapName=netgroup.byhost,dc=example,dc=com”
导入后页面展示结果如下:

5、导入指定的用户
可以进行批量导入用户,也可以指定导入用户,操作如下:
①、创建系统用户test并设置密码为test
useradd test
②、查看用户是否创建成功,并导入到指定文件
grep -E "test" /etc/passwd >/home/ldap/test_userinfo.txt
③、转换test信息为ldif文件
/usr/share/migrationtools/migrate_passwd.pl /home/ldap/test_userinfo.txt /home/ldap/test_userinfo.ldif
④、导入系统
ldapadd -x -D "uid=ldapadmin,ou=people,dc=example,dc=com" -w 12345678 -f /home/ldap/test_userinfo.ldif
过程如下:
[root@duke ldap]# ldapadd -x -D “uid=ldapadmin,ou=people,dc=example,dc=com” -w 12345678 -f /home/ldap/test_userinfo.ldif
adding new entry “uid=test,ou=people,dc=example,dc=com”
⑤、将用户组导入到指定文件
grep -E "test" /etc/group >/home/ldap/test_groupinfo.txt
⑥、转换组信息为ldif文件
/usr/share/migrationtools/migrate_group.pl /home/ldap/test_groupinfo.txt /home/ldap/test_groupinfo.ldif
⑦、导入到系统
ldapadd -x -D "uid=ldapadmin,ou=people,dc=example,dc=com" -w 12345678 -f /home/ldap/test_groupinfo.ldif
过程如下:
[root@duke ldap]# ldapadd -x -D “uid=ldapadmin,ou=people,dc=example,dc=com” -w 12345678 -f /home/ldap/test_groupinfo.ldif
adding new entry “cn=test,ou=Group,dc=example,dc=com”
6.3.4、LDAP操作指令(知识点,配合6.3.2章节新建的test用户操作)
1、查询
查询新添加的 test 用户:
ldapsearch -LLL -x -D 'uid=ldapadmin,ou=people,dc=example,dc=com' -w 12345678 -b 'dc=example,dc=com' 'uid=test'
过程如下:
[root@duke ldap]# ldapsearch -LLL -x -D ‘uid=ldapadmin,ou=people,dc=example,dc=com’ -w 12345678 -b ‘dc=example,dc=com’ ‘uid=test’
dn: uid=test,ou=people,dc=example,dc=com
uid: test
cn: test
objectClass: account
objectClass: posixAccount
objectClass: top
objectClass: shadowAccount
userPassword:: e2NyeXB0fSQ2JC56ZzI4a0JtJFNaeFlJV3Q1TjlBT2hlaHpOQThJN1RZYWFiVlZ
4Y1oxcUNjb2xncmN2cUg4dmpCRXlGUjJObkJmckVsb29DSmxIaGkwZURZMjZvYnphL2dXM0hEVXQv
shadowLastChange: 17823
shadowMax: 99999
shadowWarning: 7
uidNumber: 1001
gidNumber: 1001
homeDirectory: /home/test
2、修改
用户添加好以后,需要给其设定初始密码,运行命令如下:
ldappasswd -x -D 'uid=ldapadmin,ou=people,dc=example,dc=com' -w 12345678 "uid=test,ou=people,dc=example,dc=com" -S
过程如下:
[root@duke ldap]# ldappasswd -x -D ‘uid=ldapadmin,ou=people,dc=example,dc=com’ -w 12345678 “uid=test,ou=people,dc=example,dc=com” -S
New password: 12345678
Re-enter new password:12345678
页面查看如下:


使用test用户登录页面查看如下:
登录密码是12345678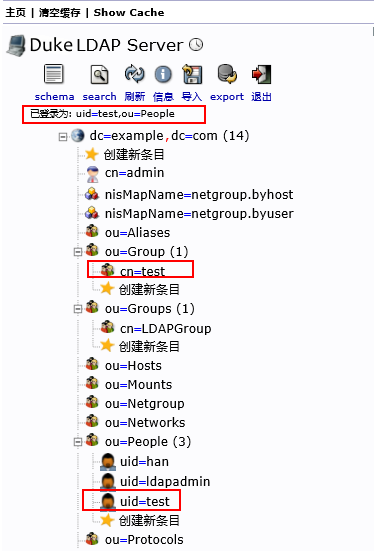

3、删除(知识点)
不要执行删除test用户,第7章节会用到
删除用户:
ldapdelete -x -w 12345678 -D'uid=ldapadmin,ou=people,dc=example,dc=com' "uid=test,ou=people,dc=example,dc=com"
删除用户组:
ldapdelete -x -w 12345678 -D'uid=ldapadmin,ou=people,dc=example,dc=com' "cn=test,ou=group,dc=example,dc=com"
6.3.5、创建kerberos用户
1、新建user.ldif文件
vim /home/ldap/user.ldif
该文件用户ldap配置kerberos所要用到的用户信息,文件内容如下:
dn: cn=kerberos,dc=example,dc=com cn: kerberos objectClass: organizationalRole dn: cn=root,dc=example,dc=com cn: root userPassword:: e1NTSEF9dnJmZXBqQ0lmUHowL1ppL0ZRU2s2RlI3R3VyTWRZeFUK objectClass: simpleSecurityObject objectClass: organizationalRole
上面userPassword:: e1NTSEF9dnJmZXBqQ0lmUHowL1ppL0ZRU2s2RlI3R3VyTWRZeFUK 中的密码生成是通过下面指令获得
1、-s后面的是密码
2、| base64后面的是密码编码格式
3、不同机器上的密码必须重新生成一次
4、每次加密密码只能使用一次
slappasswd -s 12345678 | base64
执行过程如下
[root@duke ldap]# slappasswd -s 12345678 | base64
e1NTSEF9dnJmZXBqQ0lmUHowL1ppL0ZRU2s2RlI3R3VyTWRZeFUK
2、载入用户信息
ldapadd -x -D "uid=ldapadmin,ou=people,dc=example,dc=com" -w 12345678 -f /home/ldap/user.ldif
执行过程如下:
[root@duke ldap]# ldapadd -x -D “uid=ldapadmin,ou=people,dc=example,dc=com” -w 12345678 -f /home/ldap/user.ldif
adding new entry “cn=kerberos,dc=example,dc=com”
adding new entry “cn=root,dc=example,dc=com”
3、管理员修改普通用户的密码
将cn=root,dc=example,dc=com用户密码修改为:root
ldappasswd -x -D "uid=ldapadmin,ou=people,dc=example,dc=com" -w 12345678 "cn=root,dc=example,dc=com" -s root
6.3.5、生成kerberos访问ldap的服务密码文件
因为Kerberos 需要有 ldap_kdc_dn 和 ldap_kadmind_dn 的密码才能访问 LDAP数据库,执行以下命令:
kdb5_ldap_util -D uid=ldapadmin,ou=people,dc=example,dc=com -w 12345678 stashsrvpw -f /etc/krb5.ldap cn=root,dc=example,dc=com cat /etc/krb5.ldap
过程如下:
[root@duke ldap]# kdb5_ldap_util -D uid=ldapadmin,ou=people,dc=example,dc=com -w 12345678 stashsrvpw -f /etc/krb5kdc/service.keyfile cn=root,dc=example,dc=com
Password for “cn=root,dc=example,dc=com”: 输入密码:12345678
Re-enter password for “cn=root,dc=example,dc=com”: 确认密码:12345678
[root@duke ldap]# cat /etc/krb5.ldap
cn=root,dc=example,dc=com#{HEX}3132333435363738
6.3.6、创建kerberos数据库
kdb5_ldap_util -D uid=ldapadmin,ou=people,dc=example,dc=com -w 12345678 -H ldapi:// create -r EXAMPLE.COM -s
过程如下
[root@duke ldap]# kdb5_ldap_util -D uid=ldapadmin,ou=people,dc=example,dc=com -w 12345678 -H ldapi:// create -r EXAMPLE.COM -s
Initializing database for realm ‘EXAMPLE.COM’ 初始化’EXAMPLE.COM’域的数据库
You will be prompted for the database Master Password.输入数据库主密码
It is important that you NOT FORGET this password.请勿忘记此密码,这一点很重要
Enter KDC database master key: 输入密码:12345678
Re-enter KDC database master key to verify:输入确认密码:12345678
6.3.7、重启Kerberos
service krb5-kdc restart service krb5-admin-server restart
6.3.8、测试kerberos和ldap是否整合成功(非必要操作,可以不做)
1、添加用户
kadmin.local
添加一个test用户
过程如下:
[root@duke ldap]# kadmin.local
Authenticating as principal root/[email protected] with password.
kadmin.local: addprinc test 如果要添加test用户,必须在test前输入 addprinc 关键字
WARNING: no policy specified for [email protected]; defaulting to no policy
Enter password for principal “[email protected]”: 输入test用户密码:test
Re-enter password for principal “[email protected]”: >确认test用户密码:test
Principal “[email protected]” created.
2、检查是否添加成功
slapcat |grep "test"
过程如下:
[root@duke ldap]# slapcat |grep “test”
dn: [email protected],cn=EXAMPLE.COM,cn=kerberos,dc=example,
krbPrincipalName: [email protected]
3、检查ldap页面是否添加成功

4、删除用户
此处不删除,会影响后面章节操作
过程如下:
root@yita-211:/etc# kadmin.local
Authenticating as principal root/[email protected] with password.
kadmin.local: delete_principal test 如果要删除test用户,必须在test前输入 delete_principal 关键字
7、Kerberos+LDAP认证整合
确保Kerberos和LDAP已经配置,即完成前6章的内容
7.1、采用该 LDAP作为用户认证。
1、先按照6.3.3章节的第5小点进行操作,添加test用户
2、只需要对用户 uid=test,ou=people,dc=example,dc=com 添加 userPassword成员即可。
如果通过 命令行添加,需要先准备test.ldif文件(userPassword对应的密码为12345678),内容如下:
dn: uid=test,ou=people,dc=example,dc=com changetype: modify replace: userPassword userPassword:: e1NTSEF9ZmtrZzNrOUUrY08rTS9CejFza0FhVk9TV3dZVlZ6akkK
然后执行命令
ldapmodify -x -D 'cn=root,dc=example,dc=com' -w root -h 192.168.0.2 -f /home/ldap/test.ldif
执行过程如下:
[root@duke ldap]# vi test.ldif
dn: uid=test,ou=people,dc=example,dc=com
changetype: modify
replace: userPassword
userPassword:: e1NTSEF9ZmtrZzNrOUUrY08rTS9CejFza0FhVk9TV3dZVlZ6akkK
“test.ldif” 4L, 146C 已写入
[root@duke ldap]# ldapmodify -x -D ‘cn=root,dc=example,dc=com’ -w root -h 192.168.0.2 -f /home/ldap/test.ldif
modifying entry “uid=test,ou=people,dc=example,dc=com”
3、确认是否成功
ldapsearch -x -D 'uid=test,ou=people,dc=example,dc=com' -w 123456 192.168.0.2 -b 'ou=people,dc=example,dc=com'
执行过程如下
[root@duke ldap]# ldapsearch -x -D 'uid=test,ou=people,dc=example,dc=com' -w 12345678 192.168.0.2 -b 'ou=people,dc=example,dc=com' # extended LDIF # # LDAPv3 # base <ou=people,dc=example,dc=com> with scope subtree # filter: (objectclass=*) # requesting: 127.0.0.1 # # people, example.com dn: ou=people,dc=example,dc=com # test, people, example.com dn: uid=test,ou=people,dc=example,dc=com # ldapadmin, people, example.com dn: uid=ldapadmin,ou=people,dc=example,dc=com # search result search: 2 result: 0 Success # numResponses: 4 # numEntries: 3
7.2、使用 Kerberos 认证。
需要将用户的密码域做如下修改:
1、userPassword 对应的密码生成:
echo -n "{SASL}[email protected]" | base64
过程如下:
[root@duke ldap]# echo -n “{SASL}[email protected]” | base64
e1NBU0x9dGVzdEBFWEFNUExFLkNPTQ==
2、编写修改test用户的密码的test2.ldif文件
dn: uid=test,ou=people,dc=example,dc=com changetype: modify replace: userPassword userPassword:: e1NBU0x9dGVzdEBFWEFNUExFLkNPTQ== 过程如下:
[root@duke ldap]# vi test2.ldif
dn: uid=test,ou=people,dc=example,dc=com
changetype: modify
replace: userPassword
userPassword:: e1NBU0x9dGVzdEBFWEFNUExFLkNPTQ==
“test2.ldif” 4L, 130C 已写入
3、执行应用该修改
ldapmodify -x -D 'cn=root,dc=example,dc=com' -w root -h 192.168.0.2 -f /home/ldap/test2.ldif
过程如下:
[root@duke ldap]# ldapmodify -x -D ‘cn=root,dc=example,dc=com’ -w root -h 192.168.0.2 -f /home/ldap/test2.ldif
modifying entry “uid=test,ou=people,dc=example,dc=com”
7.3、修改saslauthd配置
1、修改配置文件
vim /etc/sysconfig/saslauthd
将
# Directory in which to place saslauthd's listening socket, pid file, and so # on. This directory must already exist. SOCKETDIR=/run/saslauthd # Mechanism to use when checking passwords. Run "saslauthd -v" to get a list # of which mechanism your installation was compiled with the ablity to use. MECH=pam # Additional flags to pass to saslauthd on the command line. See saslauthd(8) # for the list of accepted flags. FLAGS=
修改为
# Directory in which to place saslauthd's listening socket, pid file, and so # on. This directory must already exist. SOCKETDIR=/run/saslauthd # Mechanism to use when checking passwords. Run "saslauthd -v" to get a list # of which mechanism your installation was compiled with the ablity to use. MECH=kerberos5 # Additional flags to pass to saslauthd on the command line. See saslauthd(8) # for the list of accepted flags. FLAGS=
2、重启saslauthd
service saslauthd restart
3、创建ldap配置文件
vim /etc/sasl2/slapd.conf文件
内容:
pwcheck_method: saslauthd
过程如下
[root@duke ldap]# vim /etc/sasl2/slapd.conf
pwcheck_method: saslauthd
“/etc/sasl2/slapd.conf” 1L, 26C 已写入
4、重启ldap
service slapd restart
5、查看saslauthd是否报错
service saslauthd status -l
执行过程如下:
[root@duke ldap]# service saslauthd status -l Redirecting to /bin/systemctl status -l saslauthd.service ● saslauthd.service - SASL authentication daemon. Loaded: loaded (/usr/lib/systemd/system/saslauthd.service; disabled; vendor preset: disabled) Active: active (running) since 四 2018-10-25 19:54:47 CST; 4 days ago Main PID: 14333 (saslauthd) CGroup: /system.slice/saslauthd.service ├─14333 /usr/sbin/saslauthd -m /run/saslauthd -a kerberos5 ├─14334 /usr/sbin/saslauthd -m /run/saslauthd -a kerberos5 ├─14335 /usr/sbin/saslauthd -m /run/saslauthd -a kerberos5 ├─14336 /usr/sbin/saslauthd -m /run/saslauthd -a kerberos5 └─14337 /usr/sbin/saslauthd -m /run/saslauthd -a kerberos5 10月 25 19:54:47 test216 systemd[1]: Starting SASL authentication daemon.... 10月 25 19:54:47 test216 saslauthd[14333]: detach_tty : master pid is: 14333 10月 25 19:54:47 test216 saslauthd[14333]: ipc_init : listening on socket: /run/saslauthd/mux 10月 25 19:54:47 test216 systemd[1]: Started SASL authentication daemon.. 10月 25 19:55:21 test216 saslauthd[14334]: auth_krb5: krb5_get_init_creds_password: -1765328353 10月 25 19:55:21 test216 saslauthd[14334]: do_auth : auth failure: [user=test] [service=imap] [realm=] [mech=kerberos5] [reason=saslauthd internal error] 10月 25 19:55:36 test216 saslauthd[14333]: auth_krb5: krb5_get_init_creds_password: -1765328353 10月 25 19:55:36 test216 saslauthd[14333]: do_auth : auth failure: [user=test] [service=ldap] [realm=EXAMPLE.COM] [mech=kerberos5] [reason=saslauthd internal error]
7.4、增加kerberos的用户配置
执行如下操作:
kadmin.local -q "ank -clearpolicy -randkey host/test216" kadmin.local -q "ktadd host/test216" service saslauthd restart ps -aux | grep saslauthd kadmin.local -q 'ank -pw 12345678 test'
1、host/test216中的test216,是服务器名称,不能写成IP
2、ank是add_principal的简写,表示增加
3、-q表示静默,不进入kadmin.local的对话模式
4、-pw 表示设置test密码为12345678
7.5、测试Kerberos+OpenLDAP整合认证是否成功
1、测试kerberos认证
testsaslauthd -u test -p 12345678
执行过程如下:
[root@duke ldap]# testsaslauthd -u test -p 12345678
0: OK “Success.”
至此, Kerberos 认证测试成功。
2、测试OpenLDAP认证
ldapsearch -x -D 'uid=test,ou=people,dc=example,dc=com' -w 12345678 -h 192.168.0.2 -b 'ou=people,dc=example,dc=com'
执行过程如下:
[root@duke ldap]# ldapsearch -x -D 'uid=test,ou=people,dc=example,dc=com' -w 12345678 -h 192.168.0.2 -b 'ou=people,dc=example,dc=com' # extended LDIF # # LDAPv3 # base <ou=people,dc=example,dc=com> with scope subtree # filter: (objectclass=*) # requesting: ALL # # people, example.com dn: ou=people,dc=example,dc=com objectClass: organizationalUnit ou: people description: Users # ldapadmin, people, example.com dn: uid=ldapadmin,ou=people,dc=example,dc=com objectClass: inetOrgPerson objectClass: posixAccount objectClass: shadowAccount cn: LDAP admin account uid: ldapadmin sn: ldapadmin uidNumber: 1001 gidNumber: 100 homeDirectory: /home/ldap loginShell: /bin/bash # test, people, example.com dn: uid=test,ou=people,dc=example,dc=com uid: test cn: test objectClass: account objectClass: posixAccount objectClass: top objectClass: shadowAccount shadowLastChange: 17829 shadowMin: 0 shadowMax: 99999 shadowWarning: 7 loginShell: /bin/bash uidNumber: 1001 gidNumber: 1001 homeDirectory: /home/test userPassword:: e1NBU0x9dGVzdEBFWEFNUExFLkNPTQ== # search result search: 2 result: 0 Success # numResponses: 4 # numEntries: 3
使用 test的密码12345678到phpLDAPadmin进行登录认证

至此, OpenLDAP 认证测试成功。
3、测试Kerveros+OpenLDAP互通
- 修改test密码
过程如下:
[root@duke ldap]# kpasswd test
Password for [email protected]: 输入test原始密码:12345678
Enter new password: 输入test新密码:123456
Enter it again: 确认test新密码:123456
Password changed. - Kerveros认证
过程如下:
[root@duke ldap]# testsaslauthd -u test -p 123456
0: OK “Success.” -
OpenLDAP认证
[root@duke ldap]# ldapsearch -x -D 'uid=test,ou=people,dc=example,dc=com' -w 123456 -h 192.168.0.2 -b 'ou=people,dc=example,dc=com' # extended LDIF # # LDAPv3 # base <ou=people,dc=example,dc=com> with scope subtree # filter: (objectclass=*) # requesting: ALL # # people, example.com dn: ou=people,dc=example,dc=com objectClass: organizationalUnit ou: people description: Users # ldapadmin, people, example.com dn: uid=ldapadmin,ou=people,dc=example,dc=com objectClass: inetOrgPerson objectClass: posixAccount objectClass: shadowAccount cn: LDAP admin account uid: ldapadmin sn: ldapadmin uidNumber: 1001 gidNumber: 100 homeDirectory: /home/ldap loginShell: /bin/bash # test, people, example.com dn: uid=test,ou=people,dc=example,dc=com uid: test cn: test objectClass: account objectClass: posixAccount objectClass: top objectClass: shadowAccount shadowLastChange: 17829 shadowMin: 0 shadowMax: 99999 shadowWarning: 7 loginShell: /bin/bash uidNumber: 1001 gidNumber: 1001 homeDirectory: /home/test userPassword:: e1NBU0x9dGVzdEBFWEFNUExFLkNPTQ== # search result search: 2 result: 0 Success # numResponses: 4 # numEntries: 3 -
使用 test的密码12345678到phpLDAPadmin进行登录认证
至此, Apache+PHP+Kerberos+LDAP+phpLDAPadmin整合互通认证测试成功。
参考
[kadmin用法]
http://manpages.ubuntu.com/manpages/xenial/en/man1/kadmin.1.html
[openldap搭建说明]
https://help.ubuntu.com/community/OpenLDAPServer
[sldap配置文件说明]
http://manpages.ubuntu.com/manpages/xenial/en/man5/slapd-config.5.html